This bubbly sourdough focaccia recipe boasts a crispy crust, open crumb, and deep flavor thanks to a long rise and active sourdough starter. It’s the ultimate beginner-friendly bread—with simple ingredients, no kneading, and endless topping options.

Table of contents
- Intro to Sourdough Focaccia
- Commercial Yeast vs. Sourdough Focaccia: Which Should You Make?
- Why You’ll Love This Easy Focaccia Bread Recipe
- Ingredients (and What They Do)
- How to Make No-Knead Focaccia with Sourdough Starter (Step-by-Step Overview)
- Topping Ideas and Variations
- Tips and Tricks for the Best Focaccia Bread
- Serving Suggestions
- Storage Tips
- Recipe FAQs
- Final Thoughts
- Love This Recipe?
Intro to Sourdough Focaccia
There’s something magical about pulling a golden, bubbly focaccia from the oven—especially when it’s made with your own sourdough starter. This easy sourdough focaccia recipe is a perfect starting point for beginners and a satisfying staple for seasoned bakers. With no kneading required and a flexible fermentation schedule, it’s one of the most approachable ways to bake with wild yeast at home.
If you’re new to baking with wild yeast, don’t worry—I’ve got you covered. Learn how to make a sourdough starter from scratch with just flour, water, and a little patience. Once it’s bubbly and active, you’re ready to dive into this easy focaccia recipe.
This easy sourdough focaccia is the ultimate balance of simplicity and flavor. Here’s why it will quickly become a staple in your kitchen:

Unlike more finicky sourdough breads, this focaccia dough is forgiving and versatile. Whether you’re letting it rise overnight, cold-proofing it for a long time in the fridge, or baking it the next day, the process fits into your life—not the other way around. The result is a deeply flavorful, crusty-on-the-outside, airy-on-the-inside bread that shines with simple ingredients and makes a beautiful canvas for different toppings. Serve it warm with soup, slice it for sandwiches, or add it to a charcuterie board for that “wow” factor with minimal effort.
As a private chef, I’ve had the pleasure of making hundreds of sourdough focaccia loaves for our clients, and it’s one of the most loved items on our menu. With its crispy crust, airy crumb, and irresistible flavor, this focaccia always brings something special to the table. In fact, one of our clients loved it so much that they joked we could open a business selling focaccia alone! It’s truly a crowd-pleaser, and I’m excited to share this recipe with you so you can enjoy it at home as well.
Commercial Yeast vs. Sourdough Focaccia: Which Should You Make?
If you’ve made focaccia before, chances are it used commercial yeast (instant or active dry). Those loaves rise quickly and reliably, making them a favorite for busy bakers. But if you’ve fallen in love with the flavor and texture of sourdough bread, you might be wondering how a sourdough focaccia compares — and whether it’s worth the extra time.
Fermentation Time
Commercial yeast focaccia is fast — it can go from mixing to baking in just a few hours. Sourdough focaccia, on the other hand, relies on wild yeast and lactic acid bacteria from your sourdough starter to do the work, which takes more time. The slower fermentation allows the dough to develop incredible depth of flavor and a lighter, more open crumb.
If you enjoy slow, intentional baking, sourdough focaccia rewards patience with exceptional results — much like other sourdough favorites, such as my sourdough artisan bread recipe or sourdough naan recipe.
Texture and Flavor
The difference in flavor is night and day. Commercial yeast focaccia has a mild, slightly sweet aroma and a uniform crumb. Sourdough focaccia, thanks to natural fermentation, has a more complex, tangy flavor and a chewier texture with beautifully irregular holes throughout. The long fermentation also enhances the crust — golden, crisp, and deeply flavorful.
If you love a chewy, tangy crumb, you’ll find this same satisfaction in my sourdough bagel recipe, where wild yeast gives each bagel a distinctive character.
Digestibility and Nutrition
Sourdough’s slow fermentation process helps break down gluten and phytic acid, making the bread easier to digest for many people and improving nutrient availability. It’s a wholesome, old-world method that transforms simple flour and water into a naturally leavened bread full of character. Commercial yeast breads don’t undergo that same enzymatic breakdown, so they’re typically less complex nutritionally.
Which One’s Right for You?
If you need focaccia in a hurry, commercial yeast is your friend. But if you want a deeply flavored, artisan-style bread that stays fresh longer and offers a beautiful connection to traditional baking, sourdough focaccia is absolutely worth it.
Once you’ve tasted the tangy, aromatic depth that only sourdough can create, you may never go back — and you might find yourself exploring other favorites like my sourdough scones or sourdough crackers recipe to expand your baking repertoire.

Why You’ll Love This Easy Focaccia Bread Recipe
- No Knead, No Fuss: The hands-off nature of this recipe means minimal effort on your part, making it perfect for beginners and experienced bakers alike.
- Deep, Rich Flavor: Thanks to the long fermentation process, the dough develops a beautiful, tangy flavor that’s uniquely sourdough without being overwhelming.
- Perfect Texture: With a crispy crust and light, airy crumb, this focaccia has the perfect texture for dipping, sandwiching, or just enjoying on its own.
- Versatile Toppings: From classic rosemary and garlic to tomatoes and mozzarella, the topping possibilities are endless. Customize it to suit your tastes or whatever’s in season!
- Crowd-Pleasing: This focaccia is always a hit at family meals, dinner parties, and special occasions, and it’s sure to impress guests with its homemade charm.
Once you try it, you’ll see why this simple sourdough focaccia recipe is a favorite among our private chef clients and a true standout in the world of homemade breads.
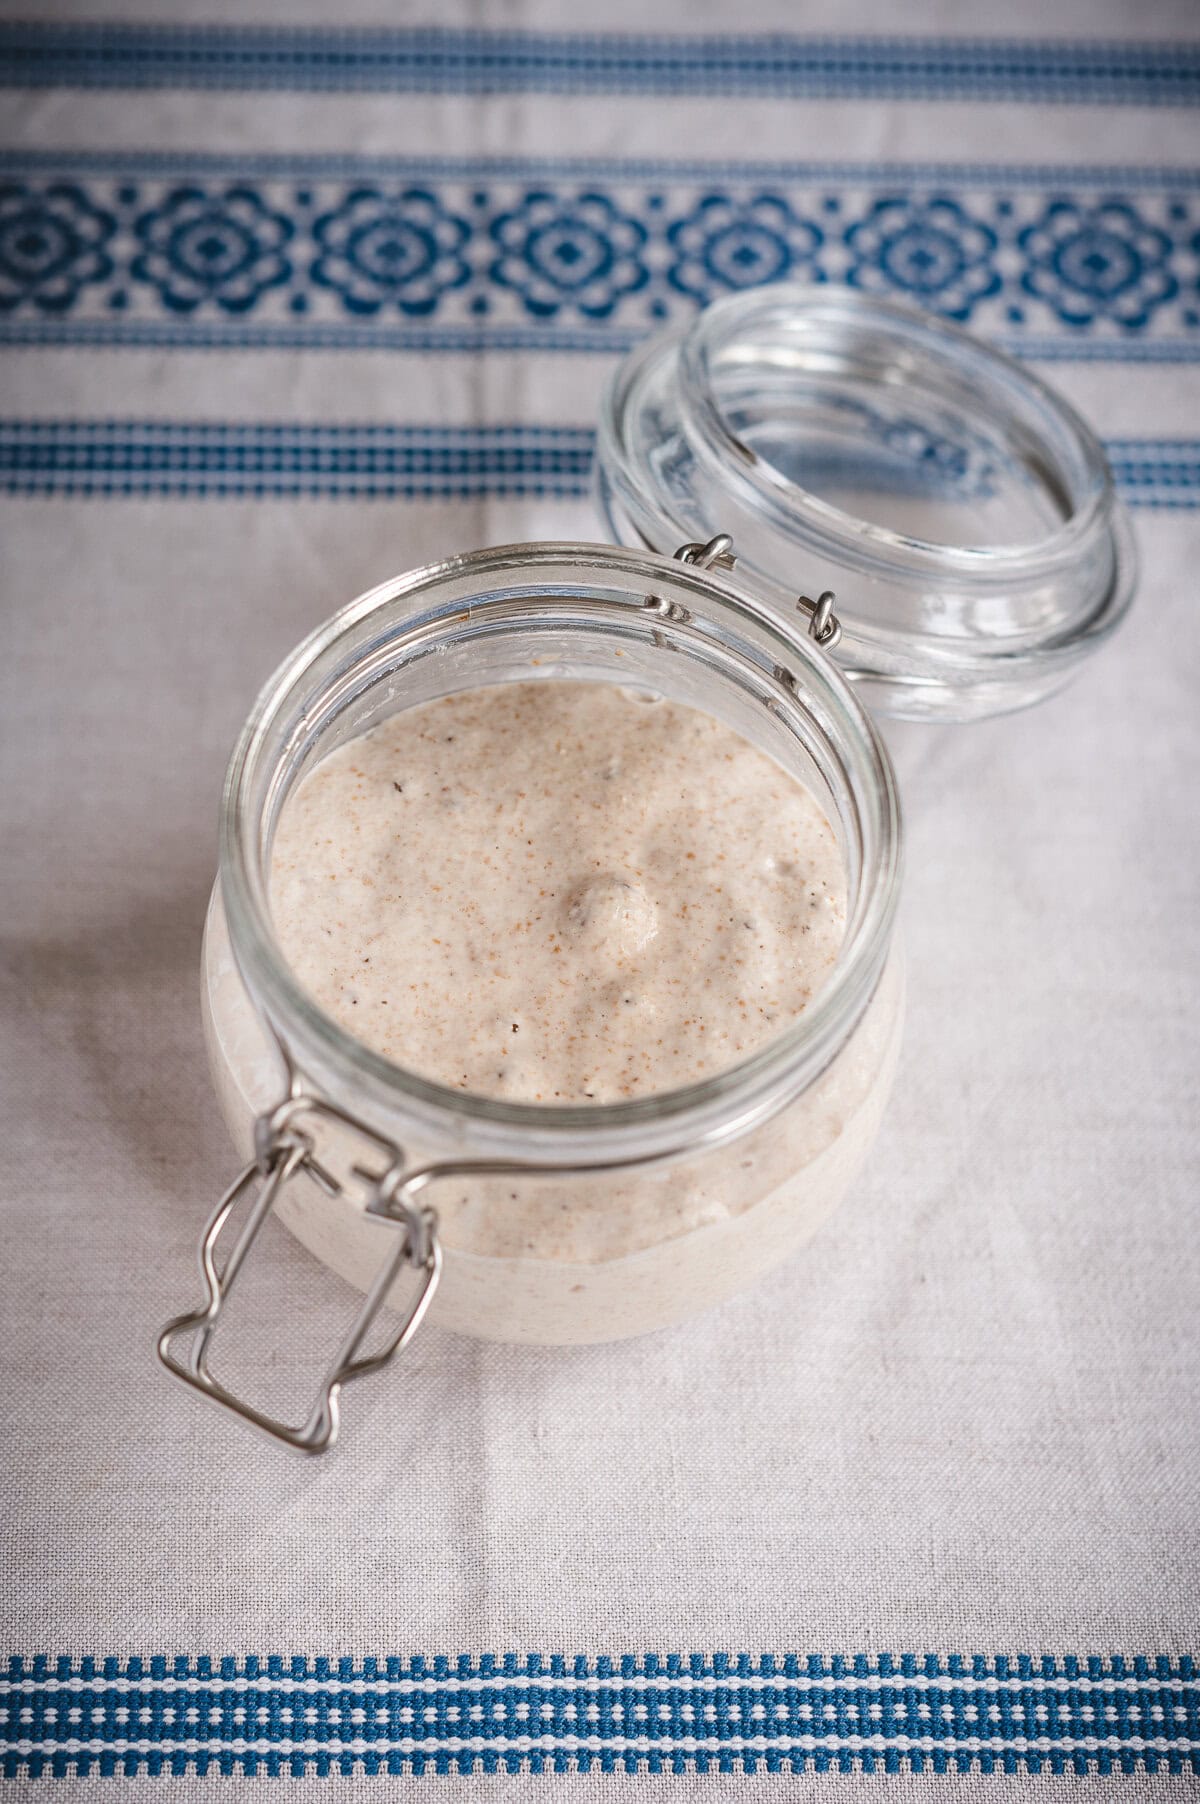
Ingredients (and What They Do)
- Active sourdough starter: Naturally leavens the dough, imparting lift and a tangy flavor.
- Warm water: Hydrates the flour and activates the starter.
- Extra virgin olive oil: Adds richness, creates a crispy crust, and prevents sticking.
- Bread flour or all-purpose flour: Provides structure and chewiness; bread flour’s higher protein content enhances gluten development.
- Whole grains (like whole wheat or rye flour): Introduce flavor depth and support extended fermentation.
- Kosher salt: Enhances taste and strengthens the dough’s structure.
- Flaky sea salt: Sprinkled on top for a flavorful crunch.
- Toppings (e.g., cherry tomatoes, fresh rosemary, garlic powder): Offer delicious variety and customization.
Pro Tip: For the best results, use good quality olive oil and high-quality flour. The quality of these simple ingredients significantly impacts the flavor and texture.
How to Make No-Knead Focaccia with Sourdough Starter (Step-by-Step Overview)
1. Mix the Dough by Hand
In a large mixing bowl, stir together the water, active sourdough starter, and extra virgin olive oil using a wooden spoon or dough whisk. Add the bread flour, whole wheat flour, and kosher salt, and mix until a sticky, wet dough forms. When mixing by hand scoop from the bottom and pull the dough up towards the center to make sure there are no pockets of dry flour.
Scrape down the sides of the bowl to ensure all flour is incorporated. There’s no need to knead—just mix until combined.
Pro Tip: Let the dough rest for 5–10 minutes after mixing to help with hydration and easier handling.

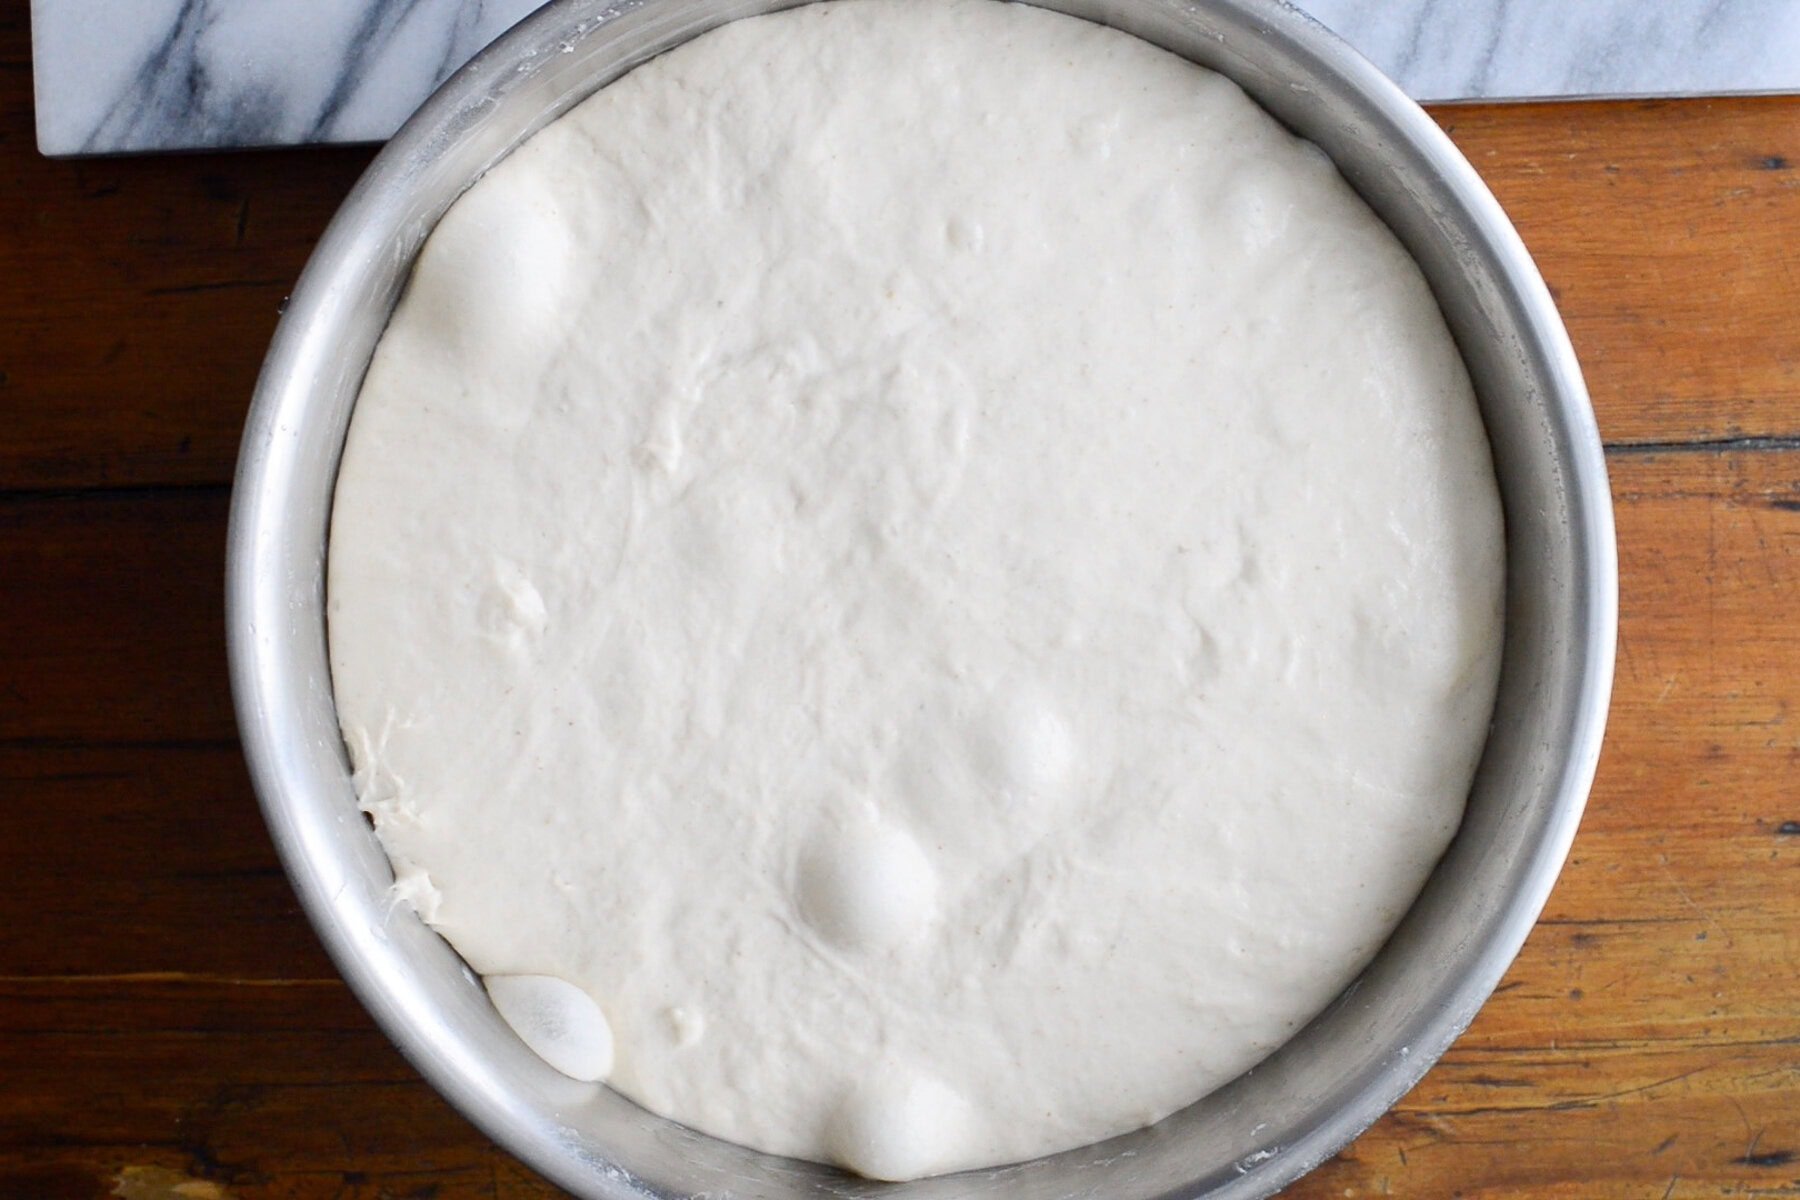
2. Bulk Fermentation (First Rise)
Cover the bowl with plastic wrap, a shower cap, or beeswax wrap (avoid a kitchen towel, which can dry out the dough). Let it sit at room temperature in a warm spot until the dough doubles in size, looks bubbly, and jiggles when gently shaken—this can take anywhere from 4 to 18 hours, depending on temperature. At warmer temperatures, the dough can rise within 4-8 hours. At cooler temperatures, it may take upwards of 12-18 hours, in which case it can be timed to bulk rise overnight. The timing can also be slowed down by refrigerating the dough after the halfway point of the bulk rise.
Quick Summary: Warmer temps = faster rise. Cooler temps = longer rise and deeper sour flavor.
3. Optional Cold Fermentation
Once the dough has risen about halfway, you can transfer it to the fridge in a sealed bag or covered bowl. It can rest there for up to 3 days to deepen flavor and fit your schedule. This slow rise adds complexity and makes the dough easier to handle. The longer the dough stays in the refrigerator the more pronounced sour flavor it will have and after 3 days it will start to lose its strength and air bubbles.
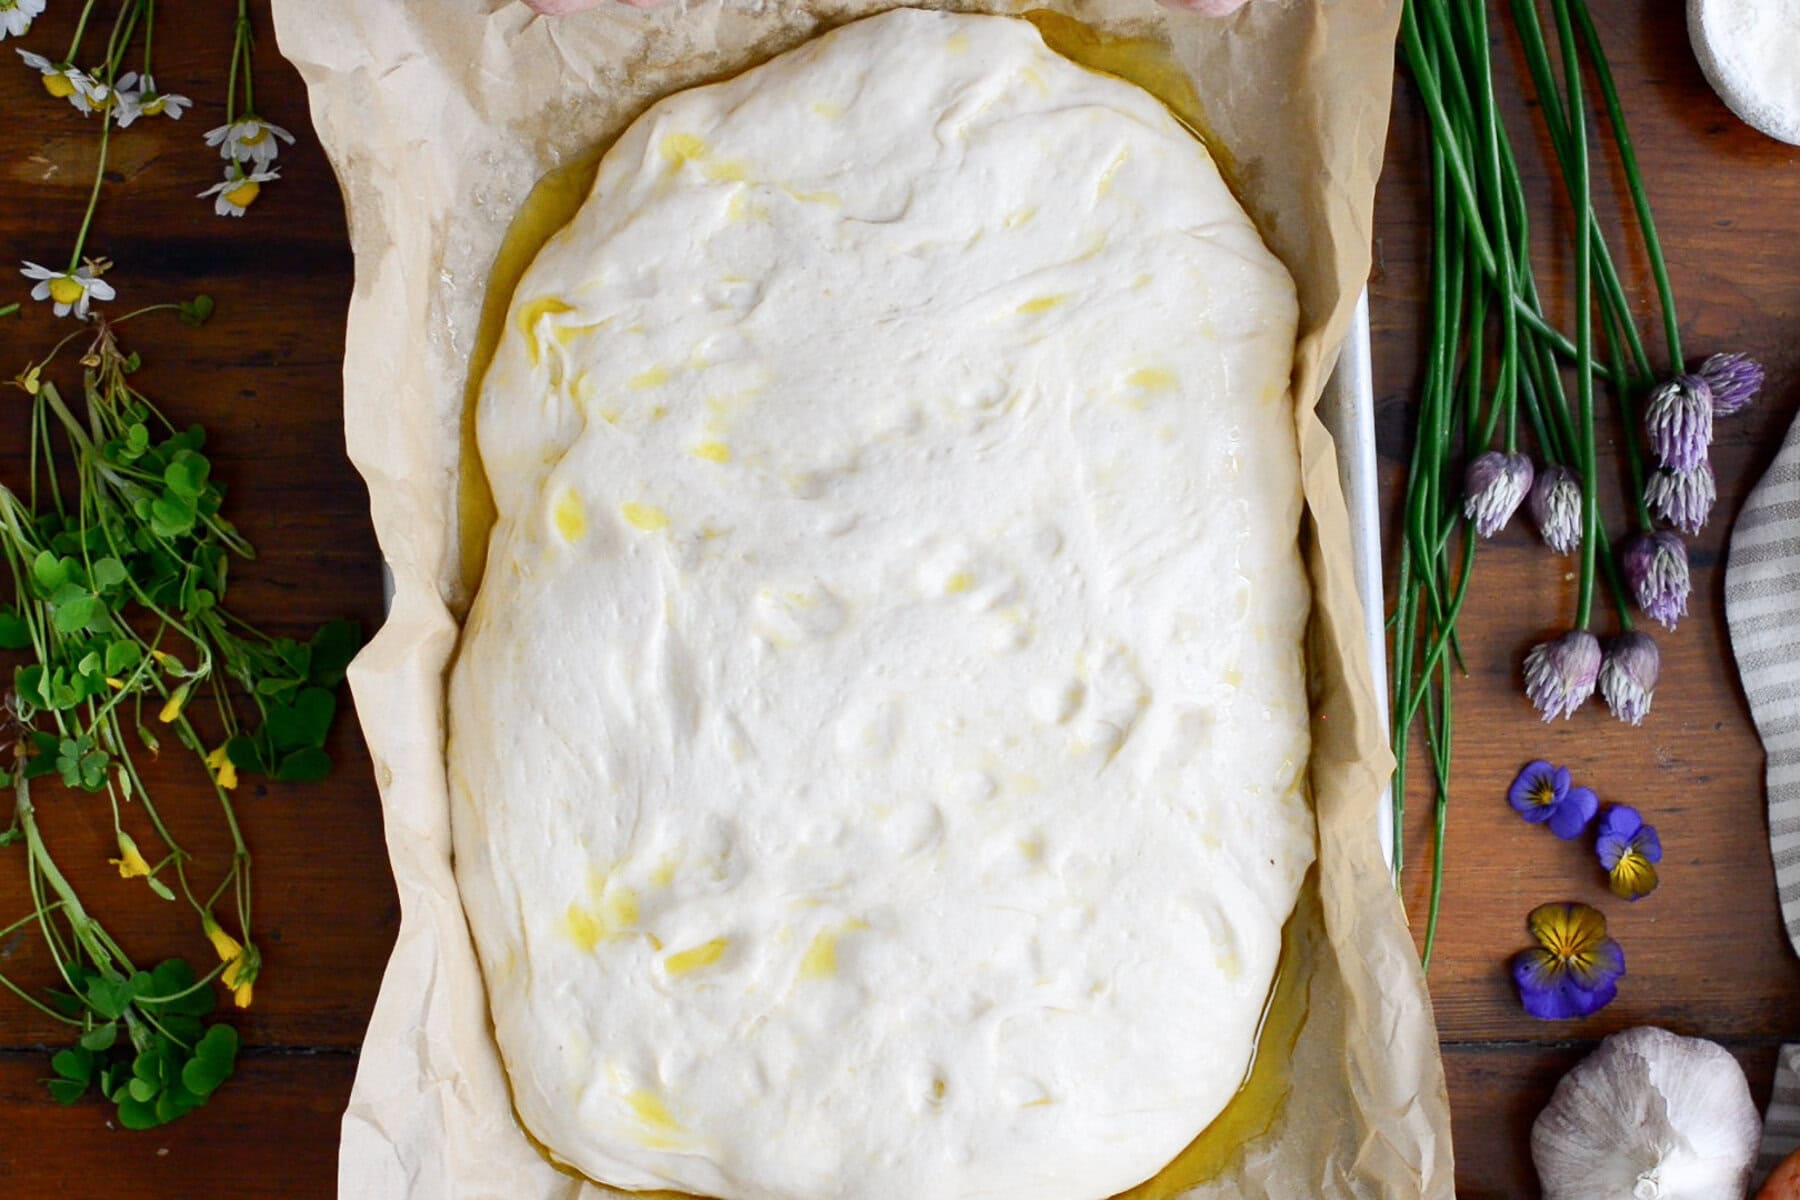
4. Pan the Focaccia Dough
Line a quarter sheet pan or rectangular pan with parchment paper, letting it come up the sides. Pour tablespoons of olive oil onto the paper, then transfer the dough to the pan. Flip it a few times to coat it completely in oil, then gently stretch it toward the edges of the pan.
Pro Tip: Don’t worry if it doesn’t reach the corners right away. Let it relax, and stretch again after a short rest.
5. Second Rise (Final Proof)
Cover the dough again with plastic wrap or place it in a proofing bag. Let it sit in a warm place for 1–2 hours, or until it becomes puffy and full of air bubbles. This step builds the structure that gives focaccia its signature open crumb and crispy crust.
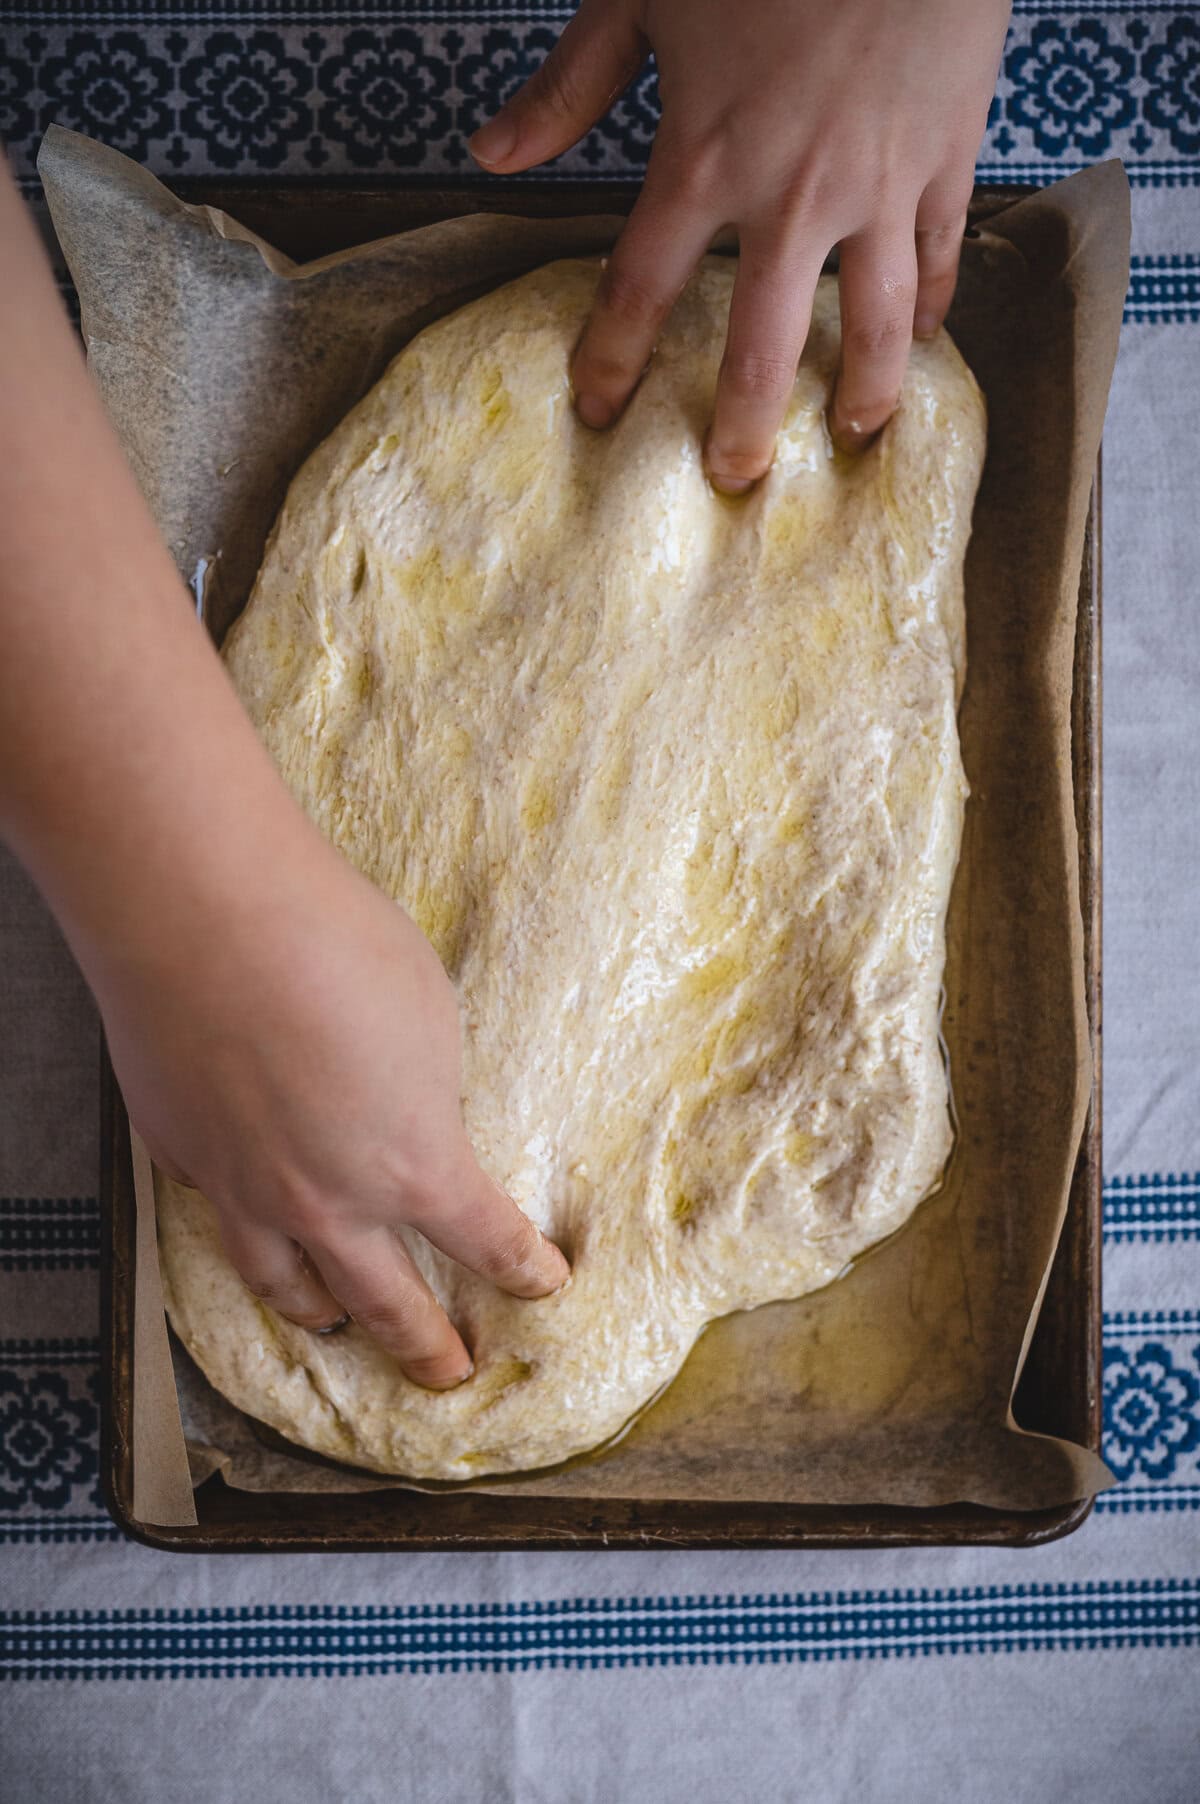
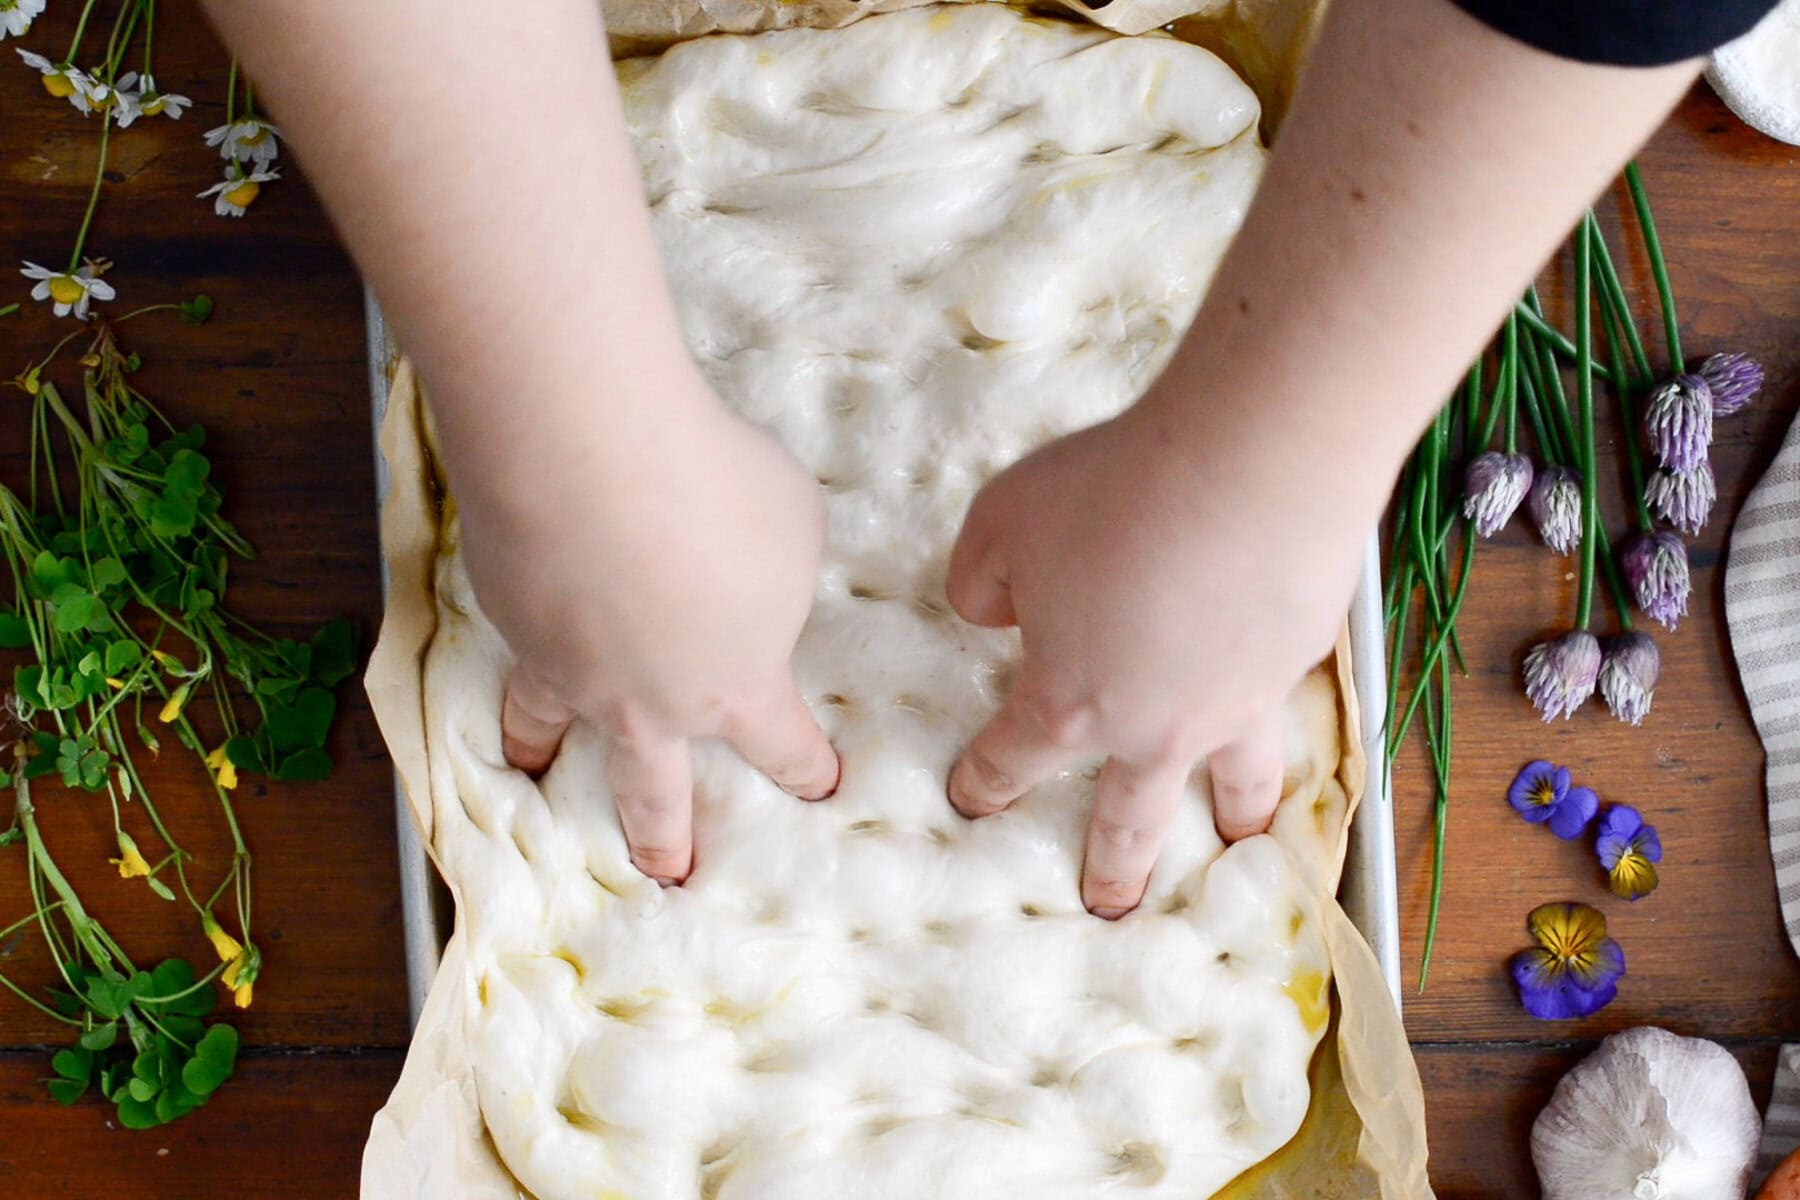
6. Dimple and Top
About 30 minutes before baking, preheat your oven to 450°F. Once the dough is ready, oil your hands and press your fingertips down into the dough to create deep dimples across the surface. Add toppings like cherry tomatoes, fresh rosemary, or a simple drizzle of olive oil and flaky sea salt.
7. Bake the Focaccia
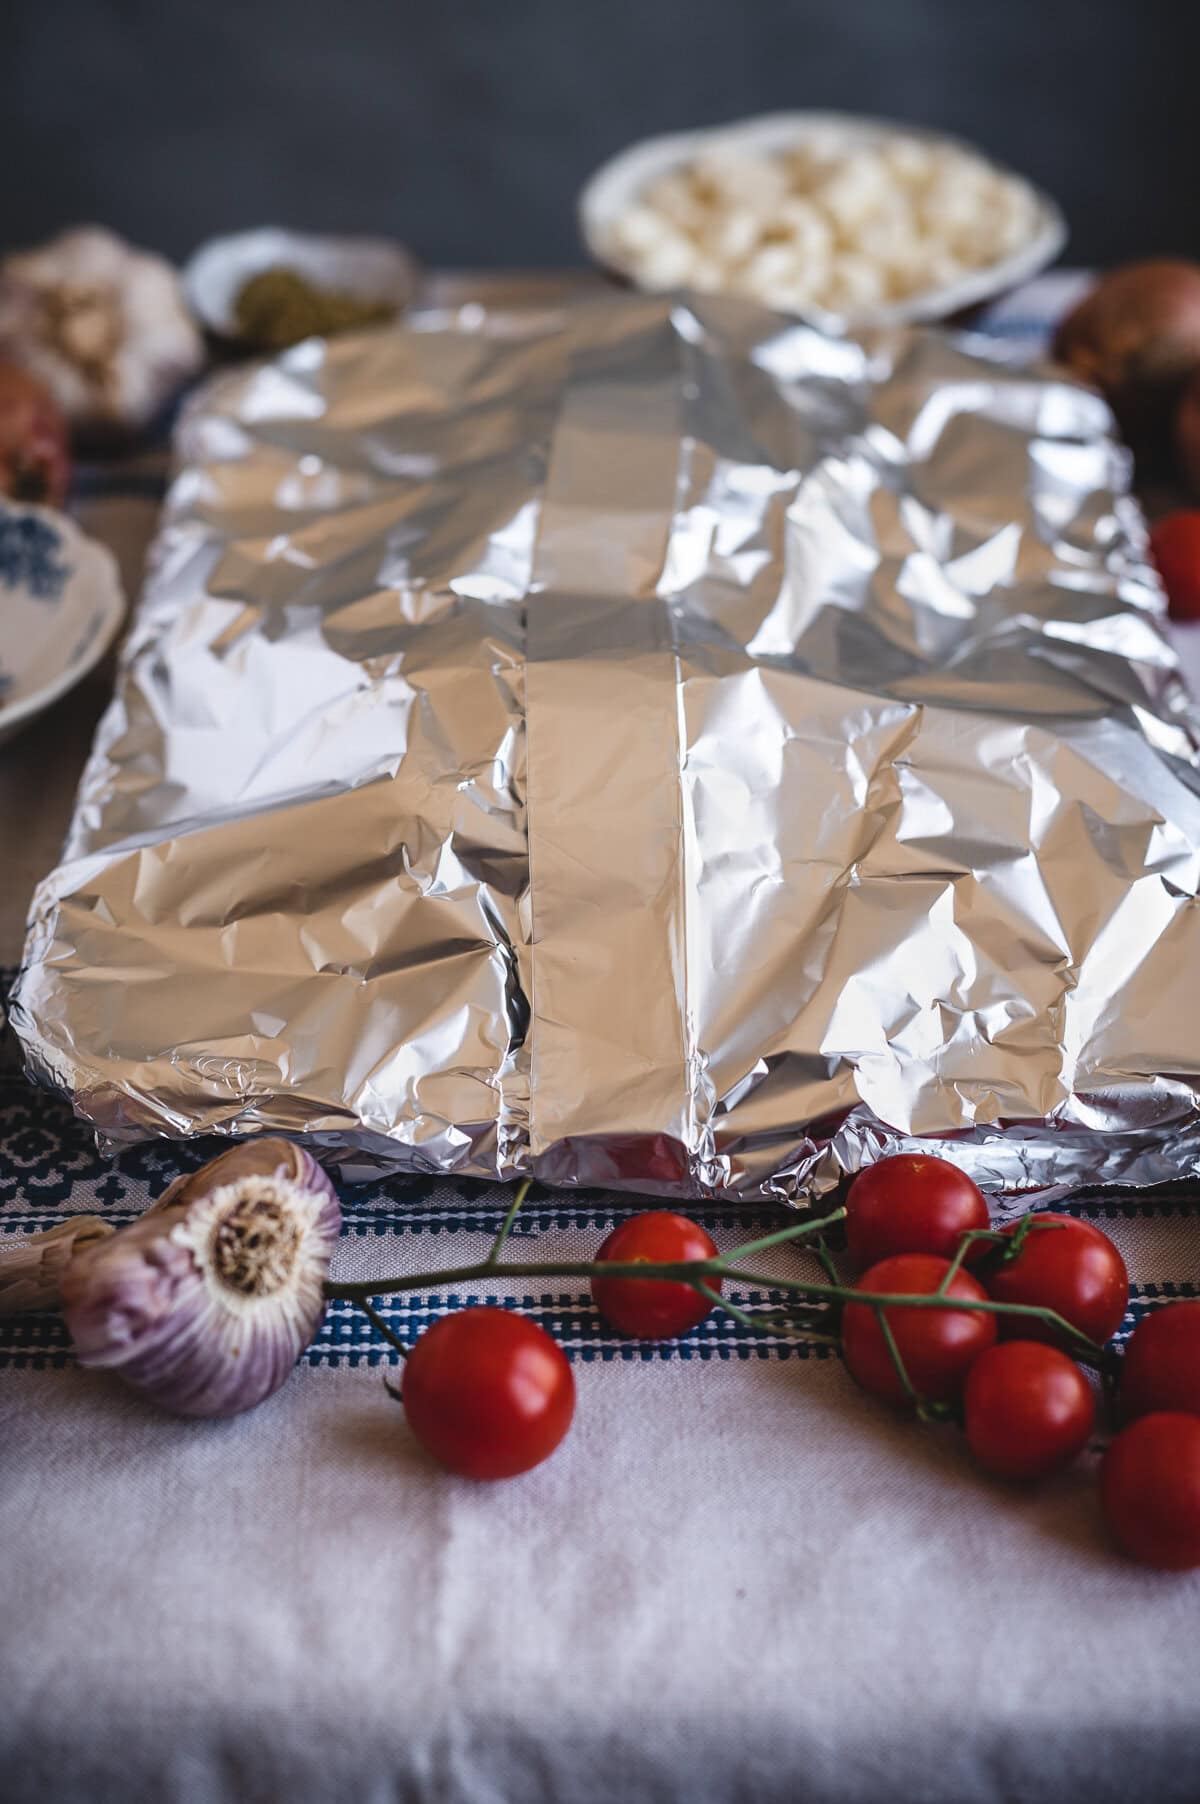
To mimic steam baking, create a foil tent: overlap two pieces of aluminum foil, fold the long edge together a few times to seal, and cover the baking pan, leaving room for the dough to rise. Seal the edges tightly.
- Bake covered for 15 minutes.
- Remove the foil (the dough will look pale but puffy).
- Continue baking uncovered for 30 minutes, or until golden brown on top.
- Transfer to a wire rack immediately to cool slightly.
Tip: Use a covered cast iron bread pan or dutch oven in place of the sheet pan and foil cover.
8. Serve and Enjoy
Slice and serve warm, or let cool completely before storing. Focaccia is best the same day it’s made but also freezes beautifully.

Topping Ideas and Variations
Simple & Classic Focaccia
Drizzle the top of the dough with extra virgin olive oil and sprinkle flaky sea salt.
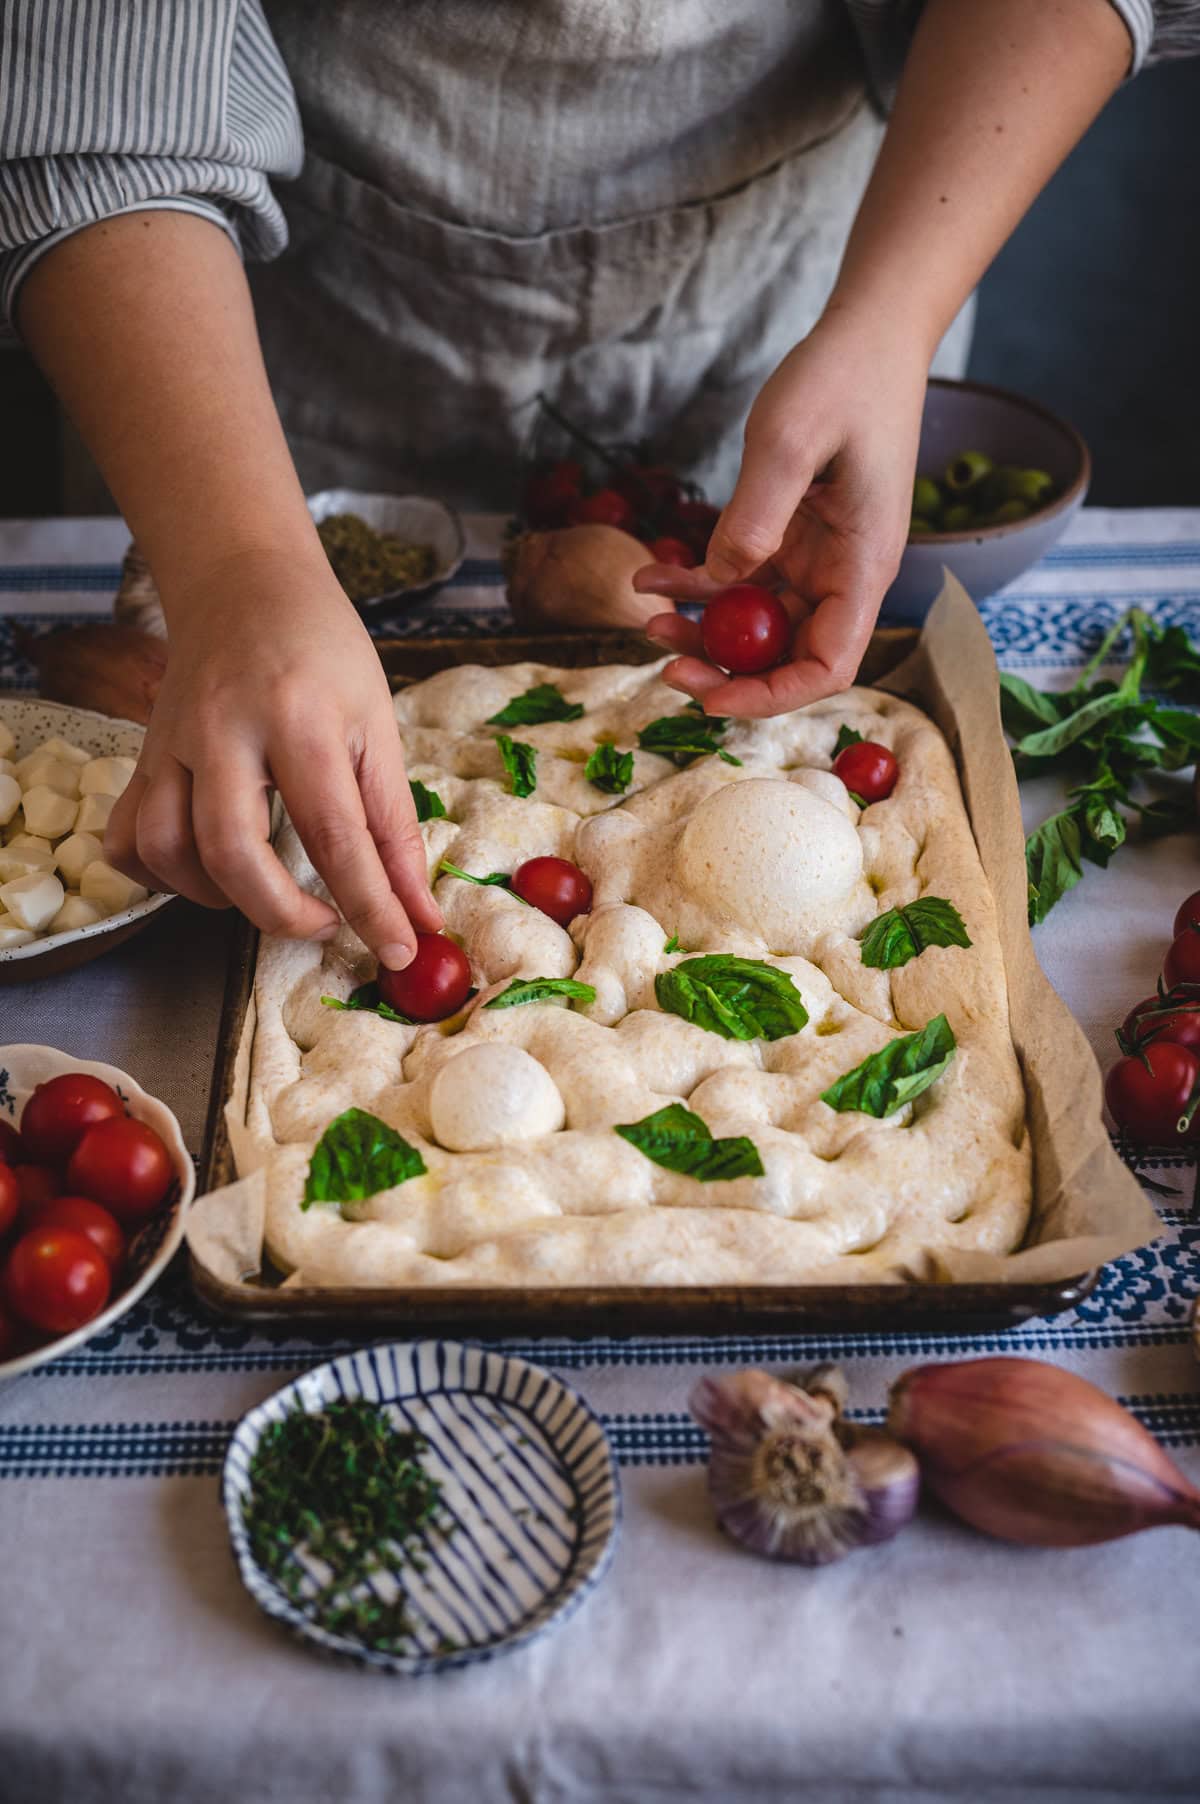
Cherry Tomatoes & Mozzarella Focaccia
Add whole cherry tomatoes, mozzarella pearls, and fresh basil—reminiscent of a caprese salad on focaccia.

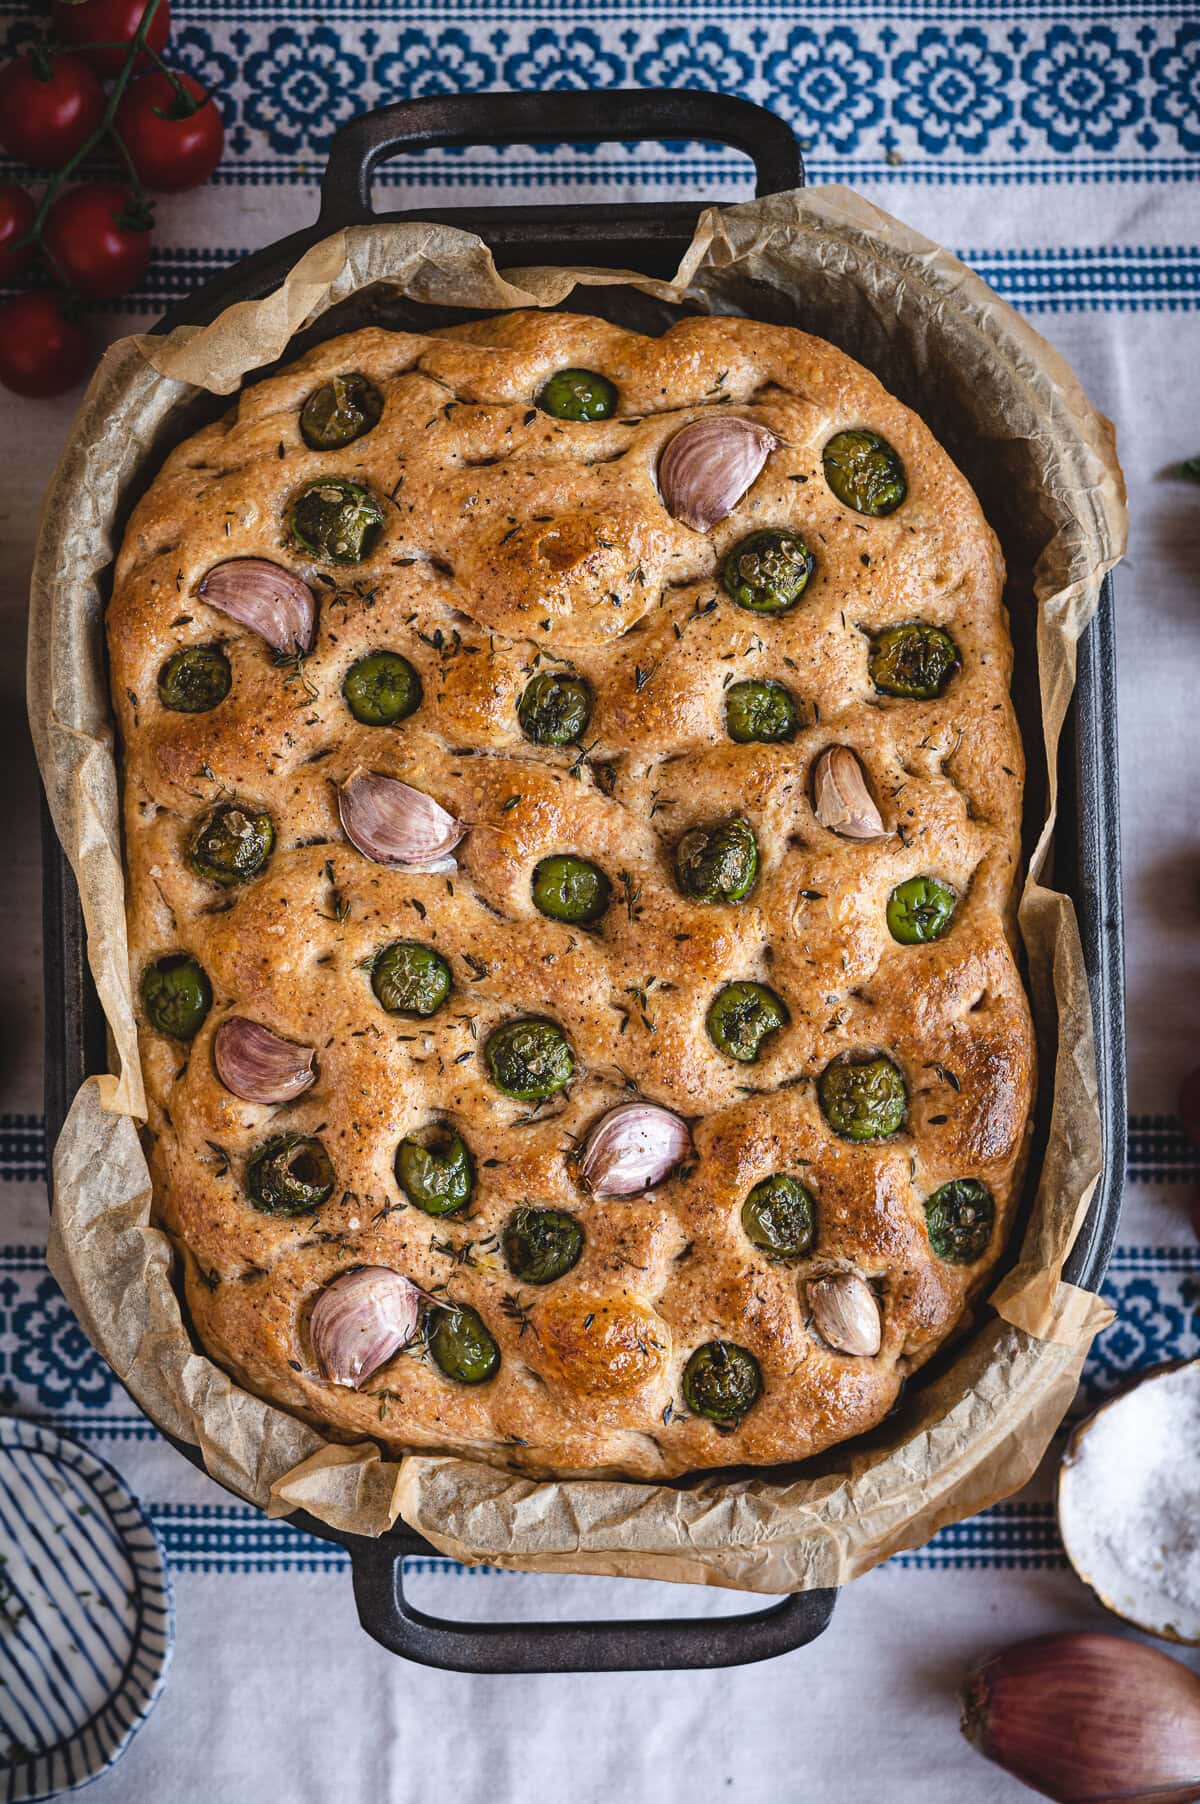
Shallot & Garlic Focaccia
Top with sliced shallots, unpeeled garlic cloves, fresh rosemary, oregano, and black pepper.
Olive & Herb Focaccia
Incorporate pitted green olives, thyme, garlic powder, and cracked pepper.
Whole Wheat Focaccia
Add whole wheat flour up to 50% of the total flour for a heartier and more flavorful focaccia.
Garden Focaccia
Use vegetables and herbs to decorate the focaccia to mimic a garden or nature scene.

Great Options: Experiment with parmesan cheese, caramelized onions, za’atar, or repurpose leftovers as sandwich bread. This dough also serves as an excellent base for pizza dough.
Tips and Tricks for the Best Focaccia Bread
- Use wet hands to handle the dough—this minimizes sticking.
- Generously oil the bottom of the pan to achieve a golden crust.
- Don’t skip the dough rest: It’s crucial for developing the dough’s structure.
- Optional coil folds can enhance strength during early fermentation.
- Bake on the bottom rack to ensure a deeply golden brown bottom.
- Cool on a wire rack before slicing to prevent sogginess.
Serving Suggestions
Pair this bubbly focaccia with:
- A bowl of seasonal soup or stew.
- Charcuterie, dips, and spreads (hummus is a favorite!).
- As sandwich bread—slice lengthwise and fill with roasted veggies, cheese, or cold cuts.
- Grilled cheese made with sourdough focaccia for ultimate comfort food.
Example: Use leftovers to craft a pressed sandwich the next day for lunch—it’s even better than fresh!

Storage Tips
- Room temperature: Store in an airtight container for up to 2 days. Wrap in plastic wrap to retain moisture.
- Freezer: Slice and freeze for long-term storage. Reheat in foil at 350°F or toast.
- Avoid covering with a kitchen towel alone—this can lead to drying out.
Recipe FAQs
Yes, you can substitute instant yeast if you don’t have a sourdough starter. However, the flavor won’t be as deep, the crumb won’t be as open and airy, and the fermentation process will be faster. Use one packet or 2.25 teaspoons of dry active yeast or instant yeast and adjust rise times accordingly – usually 1-2 hours.
It may need more time, especially at cooler temperatures. Ensure your active starter was recently fed and bubbly. You can move it to a warmer spot to encourage activity.
Absolutely. Use the dough hook attachment in the bowl of a stand mixer on low speed until a sticky dough forms. This easy recipe can also be mixed entirely by hand.
The dough should double in size and appear airy and jiggly. If it doesn’t seem ready, give it more time, especially in cooler environments.
Yes, incorporating herbs like rosemary or spices like garlic powder into the dough can enhance flavor. Add them during the initial mixing stage.
Ensure you use a generous amount of olive oil in the pan and bake the focaccia at a high temperature. Cooling on a wire rack also helps maintain the crust’s crispness.
Certainly. This versatile dough can be used for making sourdough pizza or even as a base for sandwich bread.
Store at room temperature in an airtight container for up to 2 days. For longer storage, slice and freeze. Reheat in the oven wrapped in foil or toast slices as needed.

Final Thoughts
This easy sourdough focaccia bread recipe is one of the most forgiving and rewarding ways to bake with a sourdough starter—whether you’re just beginning your sourdough journey or have been baking for years. Its light, airy crumb, deeply golden crust, and rich flavor from the long rise make it a standout among the easiest sourdough recipes.
With just a little bit of planning and a handful of simple ingredients, you’ll have a stunning homemade focaccia bread that’s just as perfect for everyday sandwiches as it is for holiday spreads. Whether you keep it classic with flaky sea salt or load it up with fresh rosemary and cherry tomatoes, good focaccia always brings joy to the table.
Try it once, and it might just become your go-to bake whenever you feed your starter. Happy baking!
Scroll down to the recipe card to get started!

More Delicious Sourdough Recipes
- How to Make Sourdough Starter from Scratch
- Homemade Artisan Sourdough Bread Recipe
- Homemade Sourdough Bagels Recipe Course
- Sourdough Discard Crackers
- Easy Sourdough Scones Recipe – Buttery, Flaky & Delicious
- Vegan Sourdough Donuts
- Sourdough Jam Sandwich Cookies
- Vegan Sourdough Danish
- Sourdough Chai Spice Star bread recipe
- Artichoke Olive and Spinach Stuffed Sourdough Star Bread
Love This Recipe?
Please leave a star rating of the recipe and let me know what you think in a comment below. This small act is a great way to show your support for the food blogs you read and love.
Tag @fareisle in your photos on Instagram with #fareisle so I can see your creations!

Sourdough Focaccia Bread Recipe (Easy – No-Knead)
Ingredients
Focaccia Dough
- 375 g water
- 50 g active sourdough starter (100% hydration, recently fed)
- 20 g extra-virgin olive oil
- 500 g bread flour
- 10 g kosher salt
For Pan
- 3 tbs extra-virgin olive oil
Toppings
- 1 tbs extra-virgin olive oil
- 1/4 tsp flaky sea salt
Optional Toppings
- 1 tbsp chopped herbs (i.e. rosemary, thyme, oregano)
- 1/4 tsp red pepper flakes
- 4 cloves unpeeled garlic
- 1 small shallot (sliced)
Instructions
- Add water to a large mixing bowl followed by the sourdough starter and olive oil then stir with a fork or dough whisk to combine everything and break up the starter.
- Add the flour and salt to the bowl and mix with the fork/dough whisk at first then switch to mixing by hand until a wet sticky dough forms after about 5 minutes. When mixing by hand scoop from the bottom and pull the dough up towards the center to make sure there are no pockets of dry flour.
- Scrape down the sides of the bowl with a dough scraper and then cover the bowl with a shower cap, plastic wrap, or beeswax wrap. Don't use a kitchen towel for this as the dough can dry out and form a crust on top.
- Let the dough bulk rise at room temperature until it doubles in volume and is very airy and jiggles when you gently shake the bowl. The bulk rise timing will depend on how warm and humid the surrounding atmosphere is. At warmer/more humid areas, the dough can rise within 4-8 hours. At cooler temperatures, it may take upwards of 12-18 hours, in which case it can be timed to bulk rise overnight. The timing can also be slowed down by refrigerating the dough after the halfway point of the bulk rise.
- After the bulk rise, the dough can be placed into a plastic zip bag and stored in the fridge for up to 3 days before proceeding. The longer the dough stays in the refrigerator the more pronounced sour flavor it will have and after 3 days it will start to lose its strength and air bubbles.
- Line a quarter sheet pan with parchment paper so that the paper comes up the sides of the pan.
- Pour the half of the olive oil onto the parchment paper then drop the focaccia dough onto the oil. Flip the dough over a couple of times to coat it entirely in the oil. Then gently stretch it out towards the corners of the pan.
- Cover the pan with plastic wrap or place it in a proofing bag and let it proof in a warm spot until it is puffy with air bubbles, about 1 hour.
- About 30 minutes before the focaccia is done proofing preheat the oven to 450˚F.
- Oil your hands and press your fingertips straight down into the dough to create dimples on the surface.
- Add toppings to the focaccia at this point or simply sprinkle the top with flaky sea salt.
- OPTIONAL STEP: Cut two pieces of aluminum foil to about 18” in length. Lay them on top of each other and fold them together from one of the long edges a few times to create one large piece of foil. Cover the sheet pan with the foil leaving enough space for the focaccia to puff up and tightly wrap the edges to hold in the steam.
- Bake for 15 minutes covered with the foil then carefully remove the foil. The focaccia will puff up but still look uncooked at this point. Bake it for 30 more minutes uncovered until the top of the focaccia is nicely browned.
- Immediately transfer the baked focaccia to a cooling rack to prevent the bottom from becoming soggy.
Video
Notes
- The focaccia can be sliced warm from the oven or cooled before slicing. It is best eaten the day it is made.
- A covered cast iron bread pan or dutch oven can be used in place of the sheet pan and foil cover.
- The best way to store focaccia is to slice and freeze it once it it cooled to room temperature. Reheat frozen focaccia wrapped in foil in the oven or thaw it in a microwave oven.
- Leave the skins on the garlic cloves to prevent the garlic from burning. This method mimics roasting garlic. Squeeze out the roasted cloves after the focaccia has cooled enough to touch.
Kaity Farrell
Have a question? Ask me here in the comments! If you’ve made the recipe, please leave your star rating and review. Thanks!