Soft, chewy, crusty bagels made at home—with your sourdough starter, no commercial yeast, and all the flavor of a great bagel shop.
If you’ve been dreaming of making bagels in your kitchen—ones that have that satisfying chewy texture and golden crust—this easy homemade sourdough bagel recipe is for you. With an active sourdough starter, simple high‑quality ingredients, and a few proven techniques (including that signature water bath), you’ll make shaped bagels that rival your favorite local bakery.

Why This Sourdough Bagel Recipe Works
Quick Summary: By using a firm dough, a proper bulk and final proof, a brief boil in honey‑sweetened water, and high‑heat baking, you’ll get the right mix of crust, chew, and flavor.
- From the moment you mix your sourdough bagel dough with bread flour (plus optional rye or whole wheat for flavour), you’re building a strong gluten network that supports the bagel’s shape and chew.
- The bulk ferment gives time for flavor and structure; the second rise after shaping ensures the holes stay open and the rings bake evenly.
- Boiling in a large pot of water with a bit of honey or malt syrup sets the crust and gives shine. This is the step that makes a “good bagel” truly feel like one.
- Baking at high heat with steam or an inverted roasting pan locks in that crusty exterior and chewy interior.
Jump to:
- Why This Sourdough Bagel Recipe Works
- Ingredients
- Equipment & Setup
- Step‑by‑Step Instructions
- Scheduling & Planning
- Flour, Sweeteners & Variation Notes
- Troubleshooting: What Can Go Wrong & How to Fix It
- Variations & Serving Ideas
- Which Flour Should You Use?
- Cooling, Storage & Freezing
- FAQs
- Final Thoughts & Your Next Batch
- Love This Recipe?
Ingredients
Here are the ingredients you’ll use—and why each matters:
- Active sourdough starter – Provides natural leavening, flavor, and that characteristic tang of a sourdough bagel.
- Water – Hydrates your dough, activates the starter, and helps form the gluten‑network in the flour.
- Honey, barley malt syrup, or brown rice syrup – Adds sweetness to support browning, improves crust color, and contributes to the crust’s chew.
- Bread flour – High protein content gives the bagel its structure and chewiness rather than a soft roll texture.
- Rye or whole wheat flour – Adds depth of flavor, subtle density, and complexity (optional but worth it).
- Kosher salt – Enhances flavor and strengthens gluten, helping the dough rise more evenly and hold shape.
- Honey/barley malt or brown rice syrup for boiling – Adds gloss and chew to the crust during the water bath.
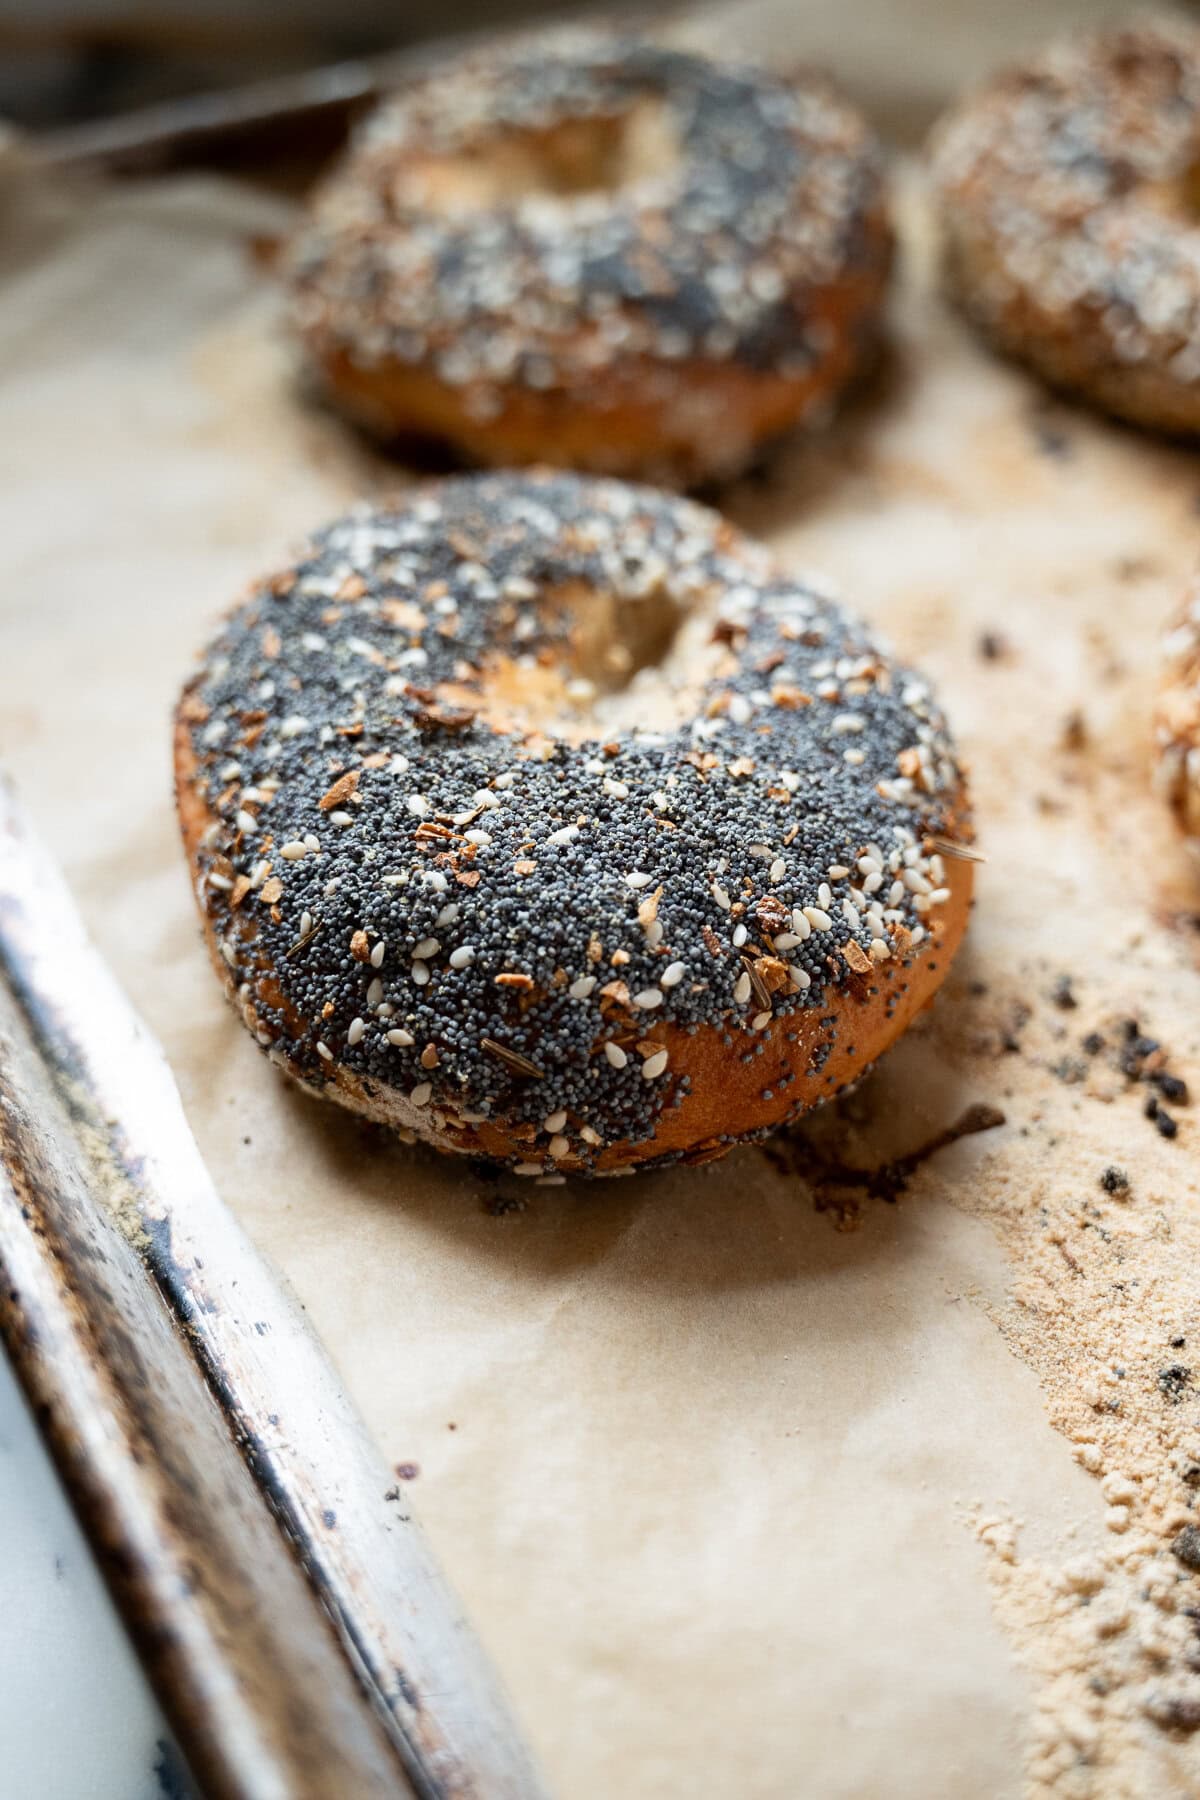
- Poppy seeds, sesame seeds, onion flakes, caraway seeds, or an everything bagel mix – These toppings add flavor, texture, and visual appeal; a fun way to personalize your bagels.

Equipment & Setup
Here’s what you’ll need for best results:
- A large mixing bowl or the bowl of a stand mixer (with a dough hook attachment if using a mixer).
- Parchment paper or parchment‑lined baking sheets for easy transfer and cleanup.
- Plastic wrap or a beeswax wrap, plus optionally a damp towel, to cover dough during proofing.
- A slotted spoon / kitchen spider to transfer bagels from the boiling water.
- A large pot of water for the water bath (enough for bagels to float freely).
- A wire rack to cool bagels after baking.
- Optional: a deep‑sided disposable aluminum foil pan inverted over the baking sheet to trap steam for extra crust.
Step‑by‑Step Instructions
Step 1: Mix the Dough
In a large bowl or mixer, add your water then your active starter. (Starter should float in water—an easy check that it’s lively.)
Pro Tip: Use room temperature or slightly warm water (not hot!) to avoid killing the starter.
Break up the starter with your hand or a fork. Then add your flours (bread + optional rye/whole wheat), kosher salt, and the syrup (honey/barley malt/brown rice).
Mix on low speed with a dough hook for about 5–8 minutes, or knead by hand until it forms a smooth, slightly tacky ball of dough. The dough will feel firm compared to sourdough bread dough—that’s normal for bagels.
Step 2: Bulk Fermentation
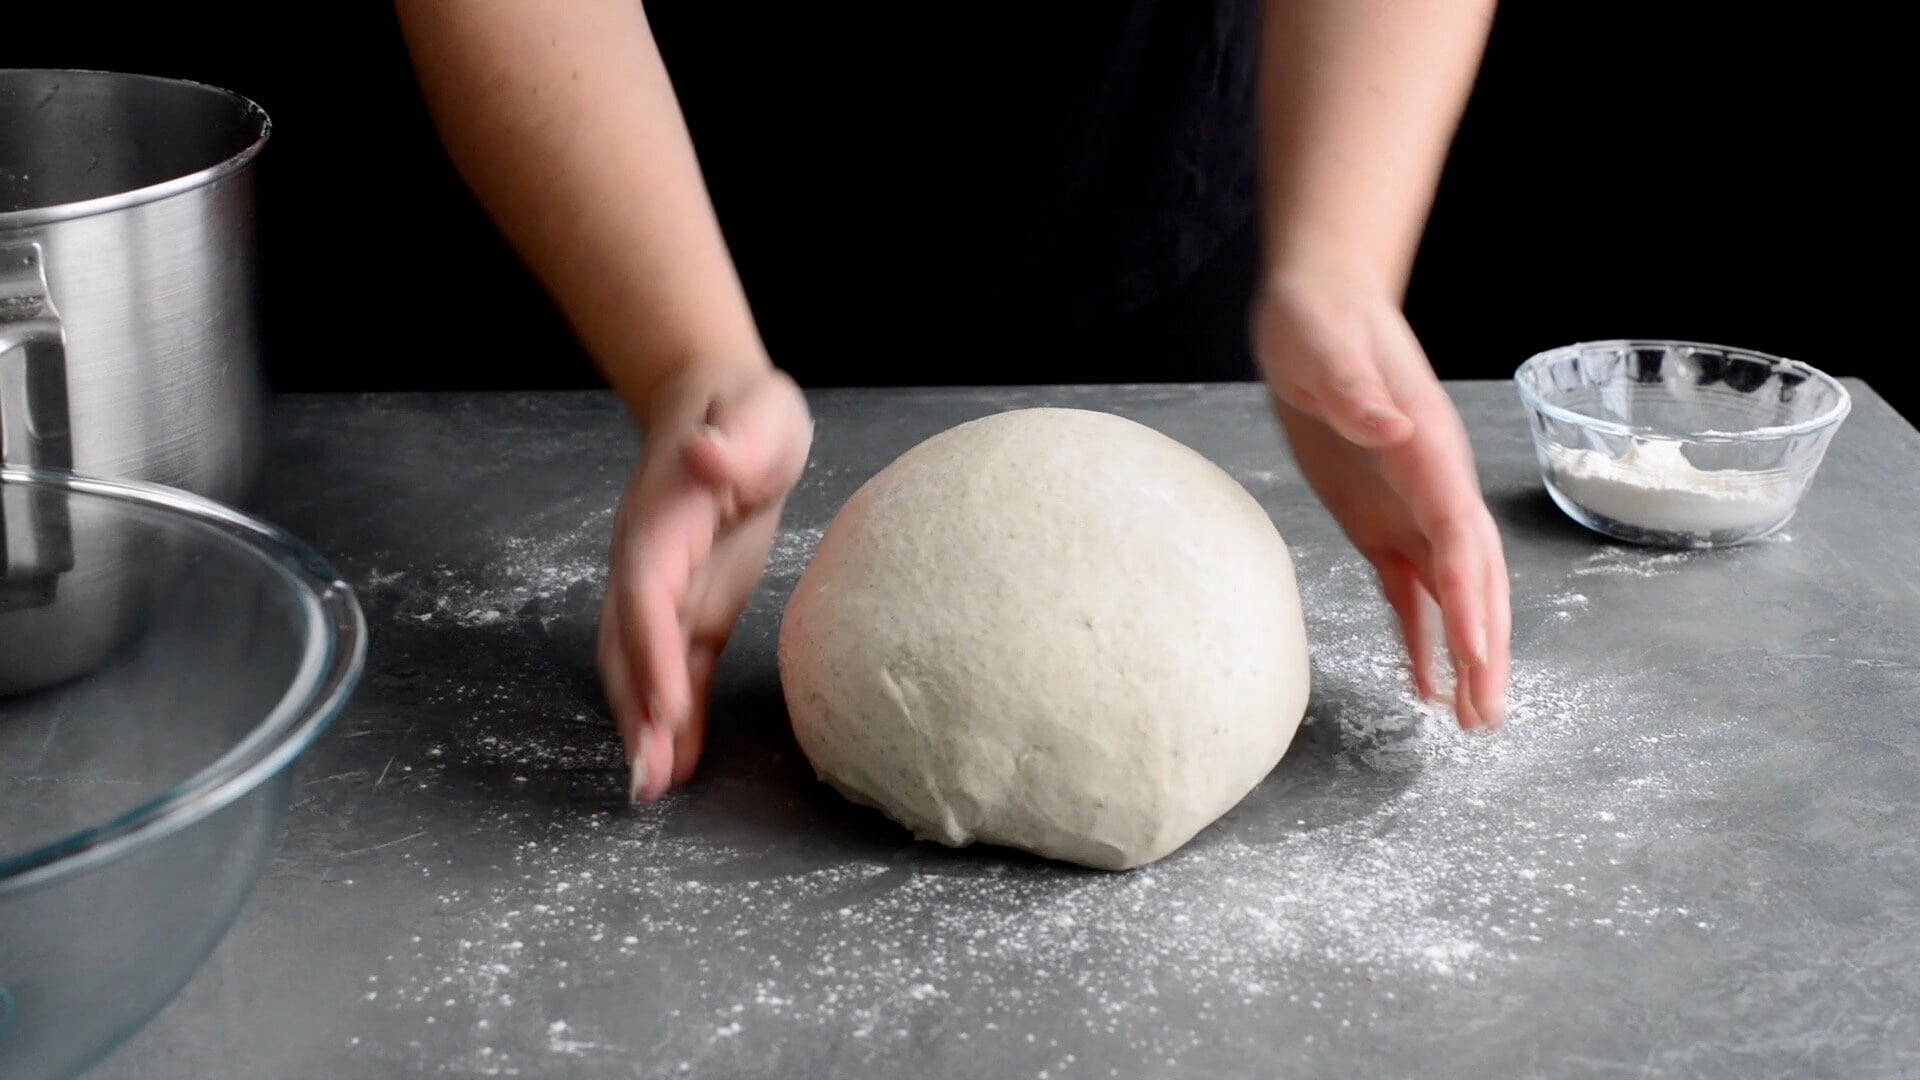
Shape the dough into a smooth ball. Place into a lightly oiled bowl, cover with plastic wrap or beeswax wrap (or shower cap) to prevent a dry skin. Let it sit in a warm place at ambient temperature until it has doubled in volume (roughly 8 hours as a guideline).
Pro Tip: If your kitchen is warm (above ~75 °F/24 °C), check after 5–6 hours and consider refrigerating overnight to avoid over‑proofing. If quite cool, the ferment may take 10+ hours.

Step 3: Portion and Rest
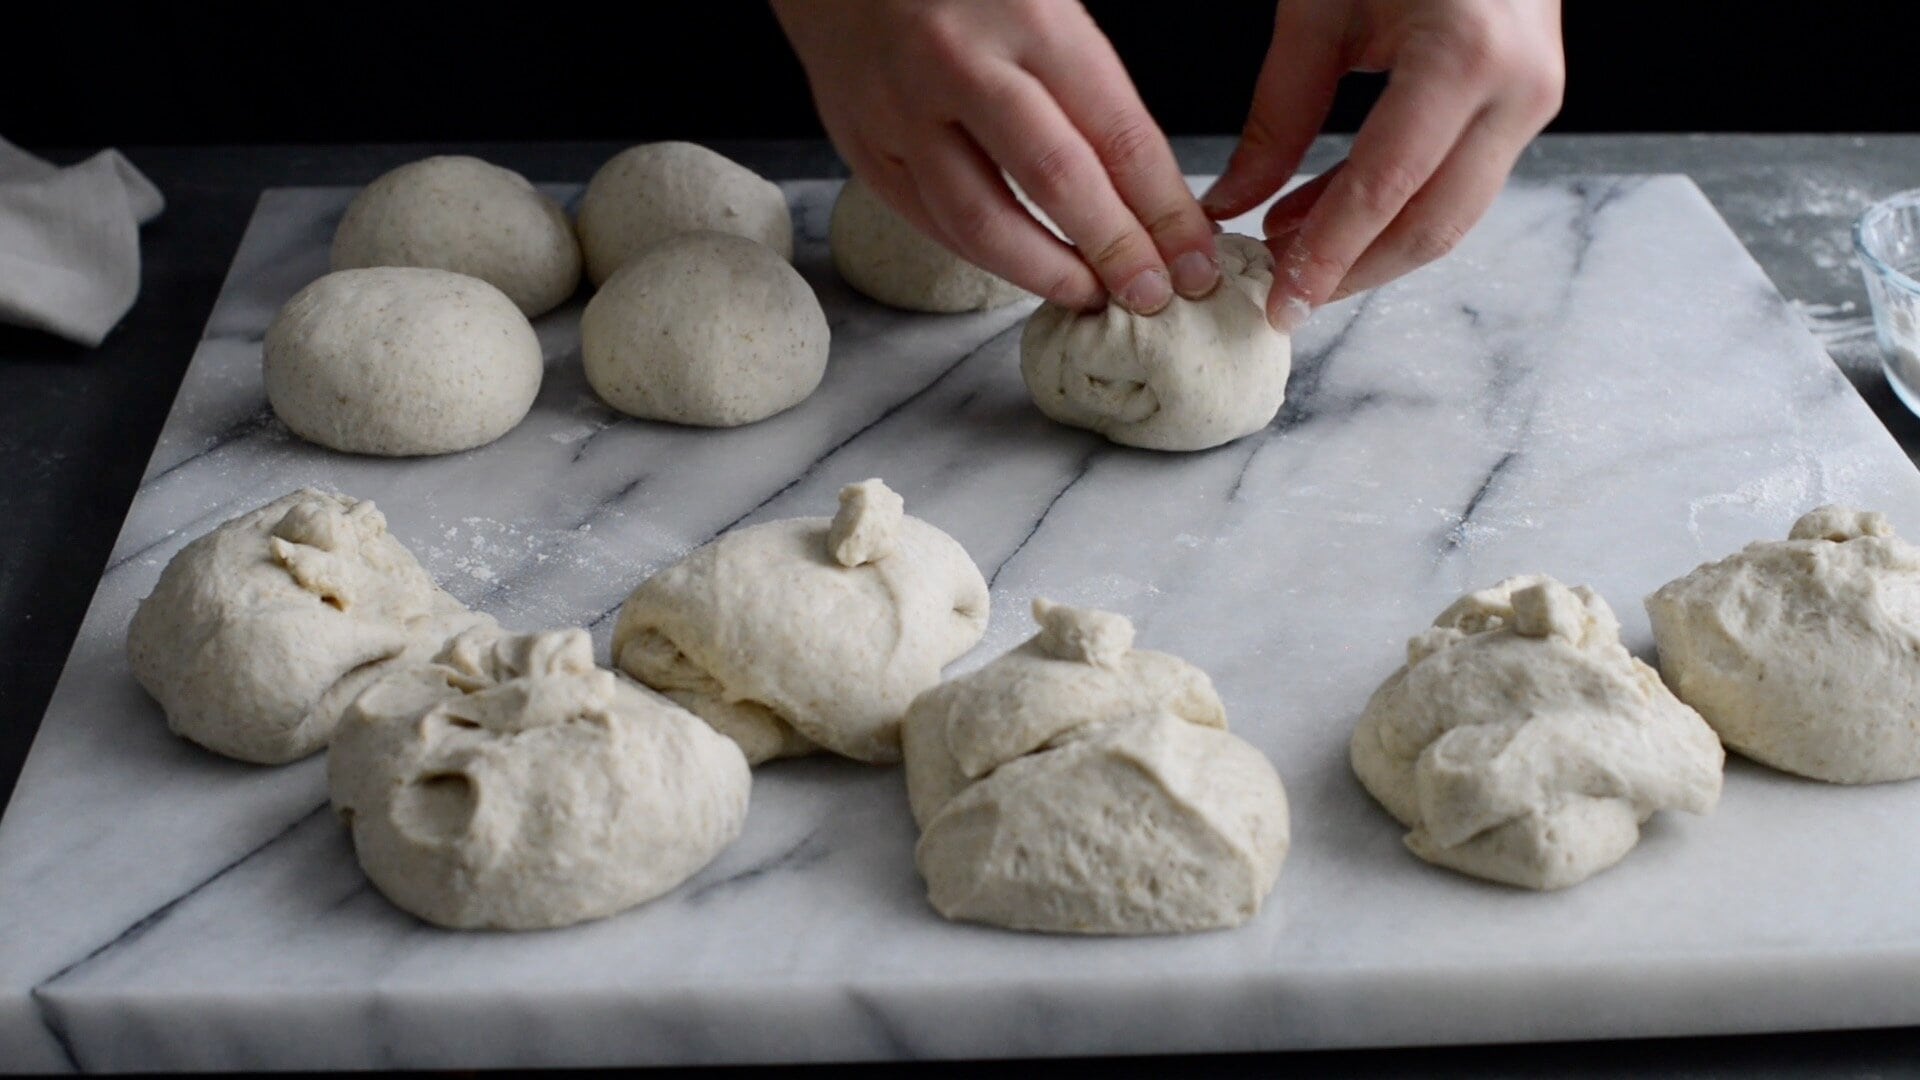
Turn the dough onto a lightly floured surface. Weigh the entire dough if you want precision, then divide into equal pieces (12 pieces in this recipe). Shape each piece into a ball of dough: stretch and fold edges underneath, flip seam‑side down, and roll slightly under your palm. Let them rest for about 10 minutes before shaping. This brief rest helps relax the gluten so shaping is smoother.
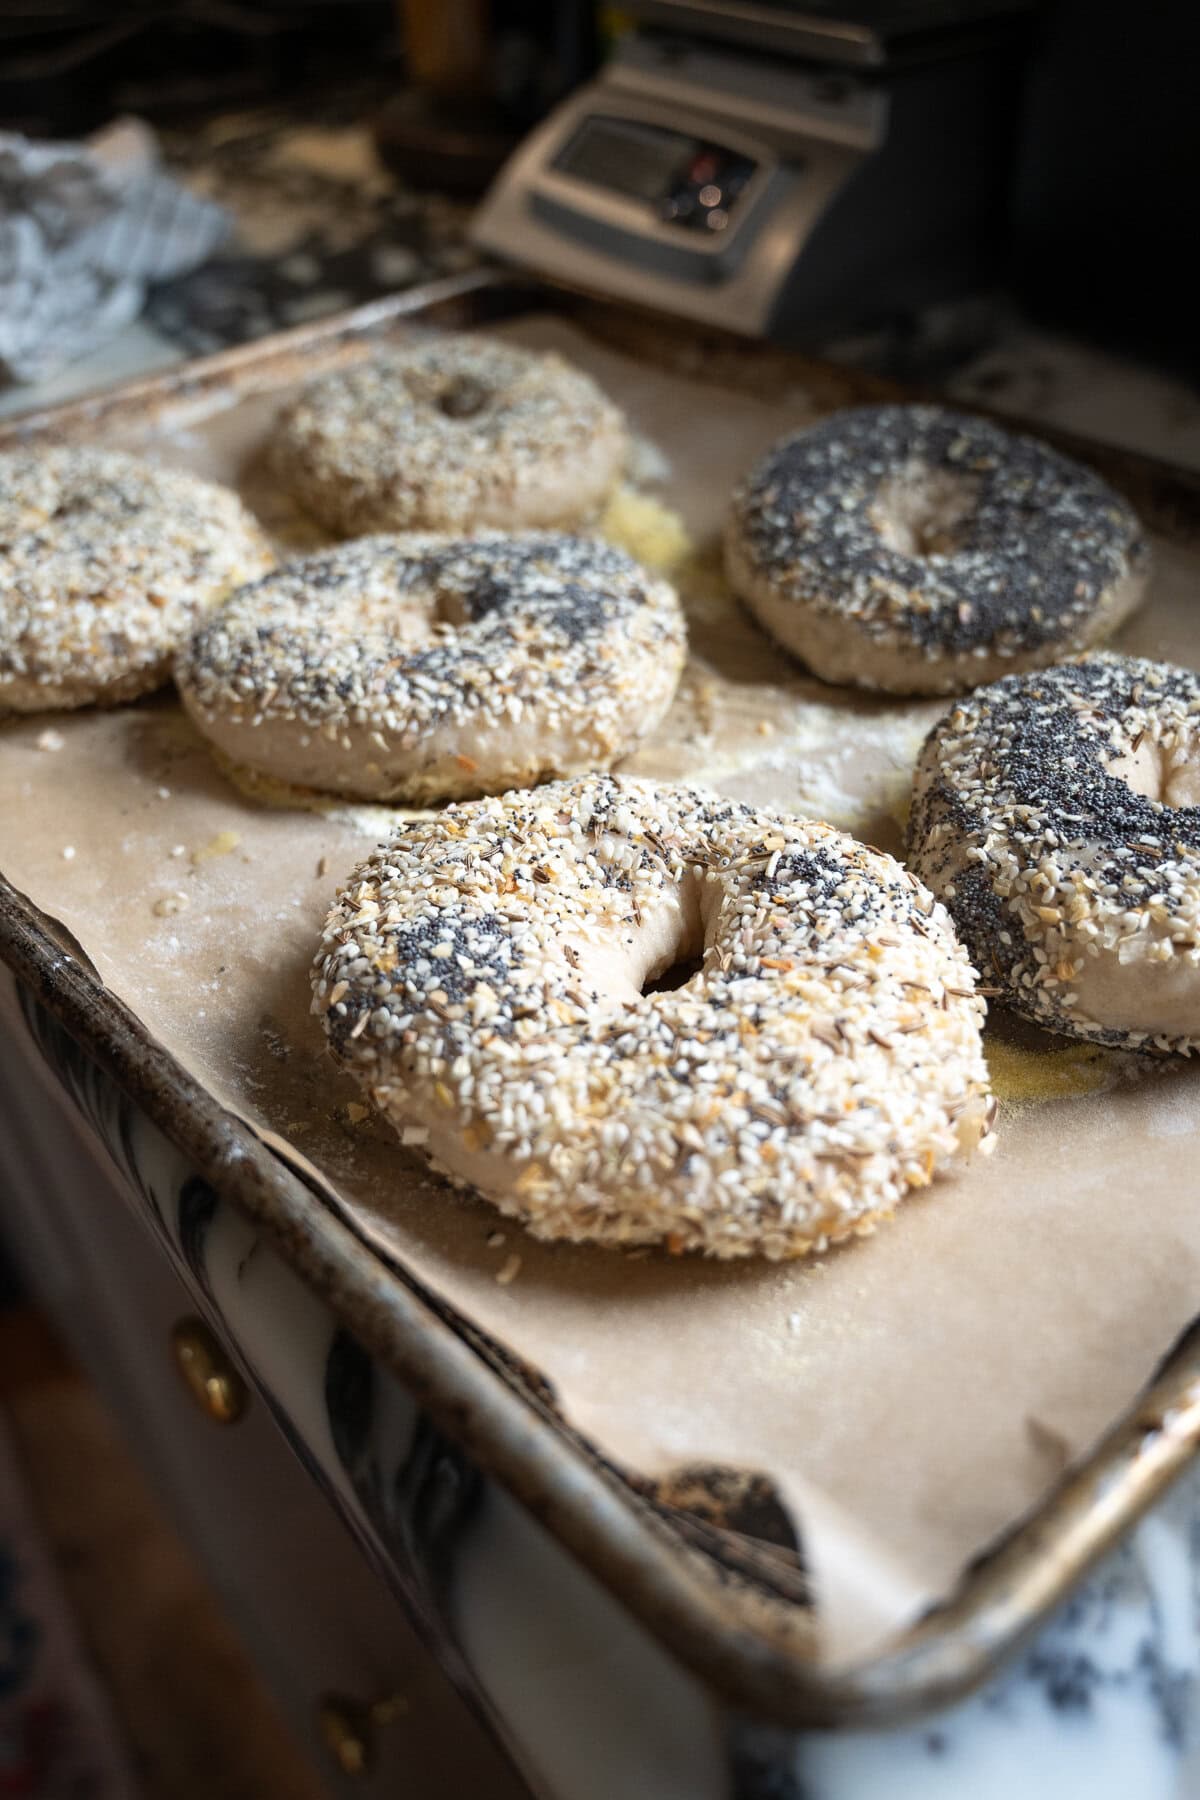
Step 4: Shape the Bagels
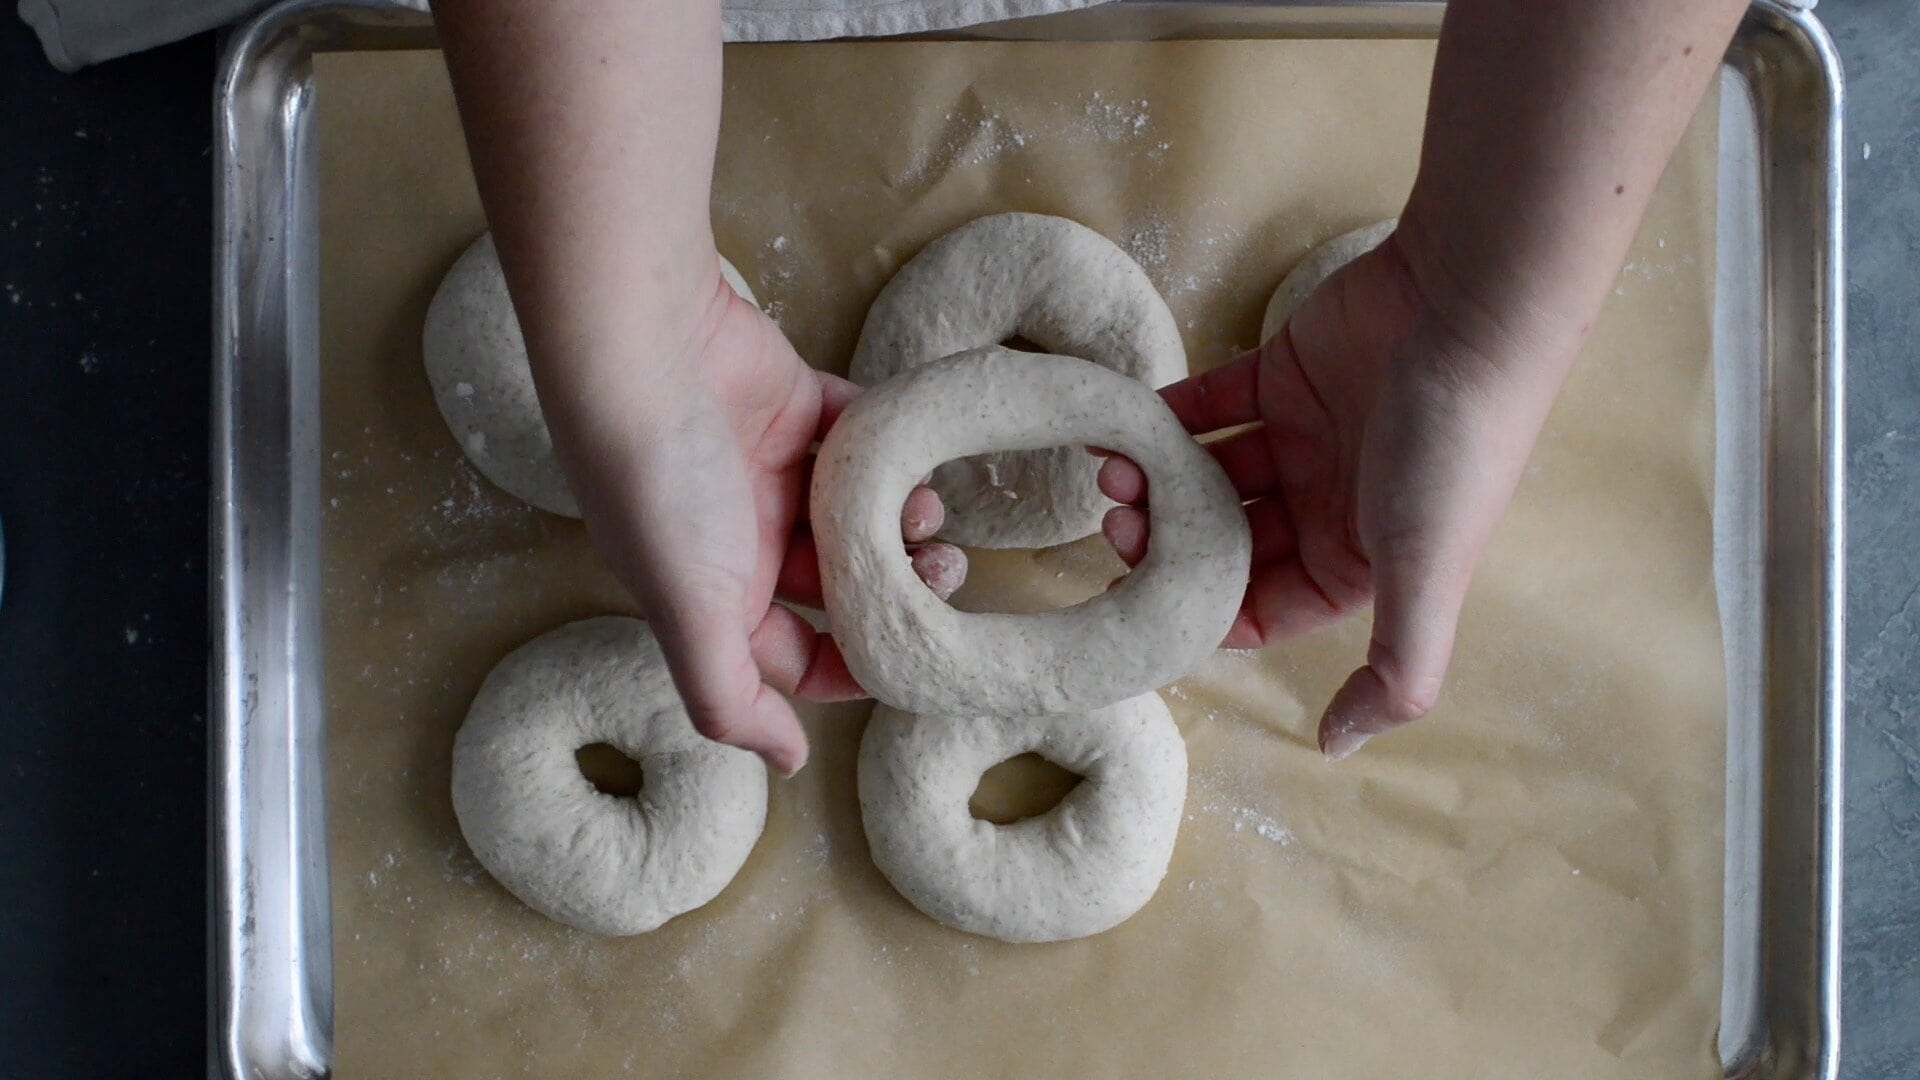
Transfer the rested dough balls to two parchment‑lined baking sheets. Cover one sheet while shaping the other to keep dough moist. To shape: push your thumb through the centre of each ball, then use your fingers to widen into a ring with about a 2″ opening (the hole will shrink slightly in proofing & baking).
Place shaped bagels on the sheets, cover with a kitchen towel, and proof at room temperature until the dough is visibly puffy and when gently pressed it slowly bounces back—not flattening entirely. This will take about 1 hour (variable based on ambient conditions).
Quick Summary: Ball → rest → thumb‑hole → stretch → ring → proof.
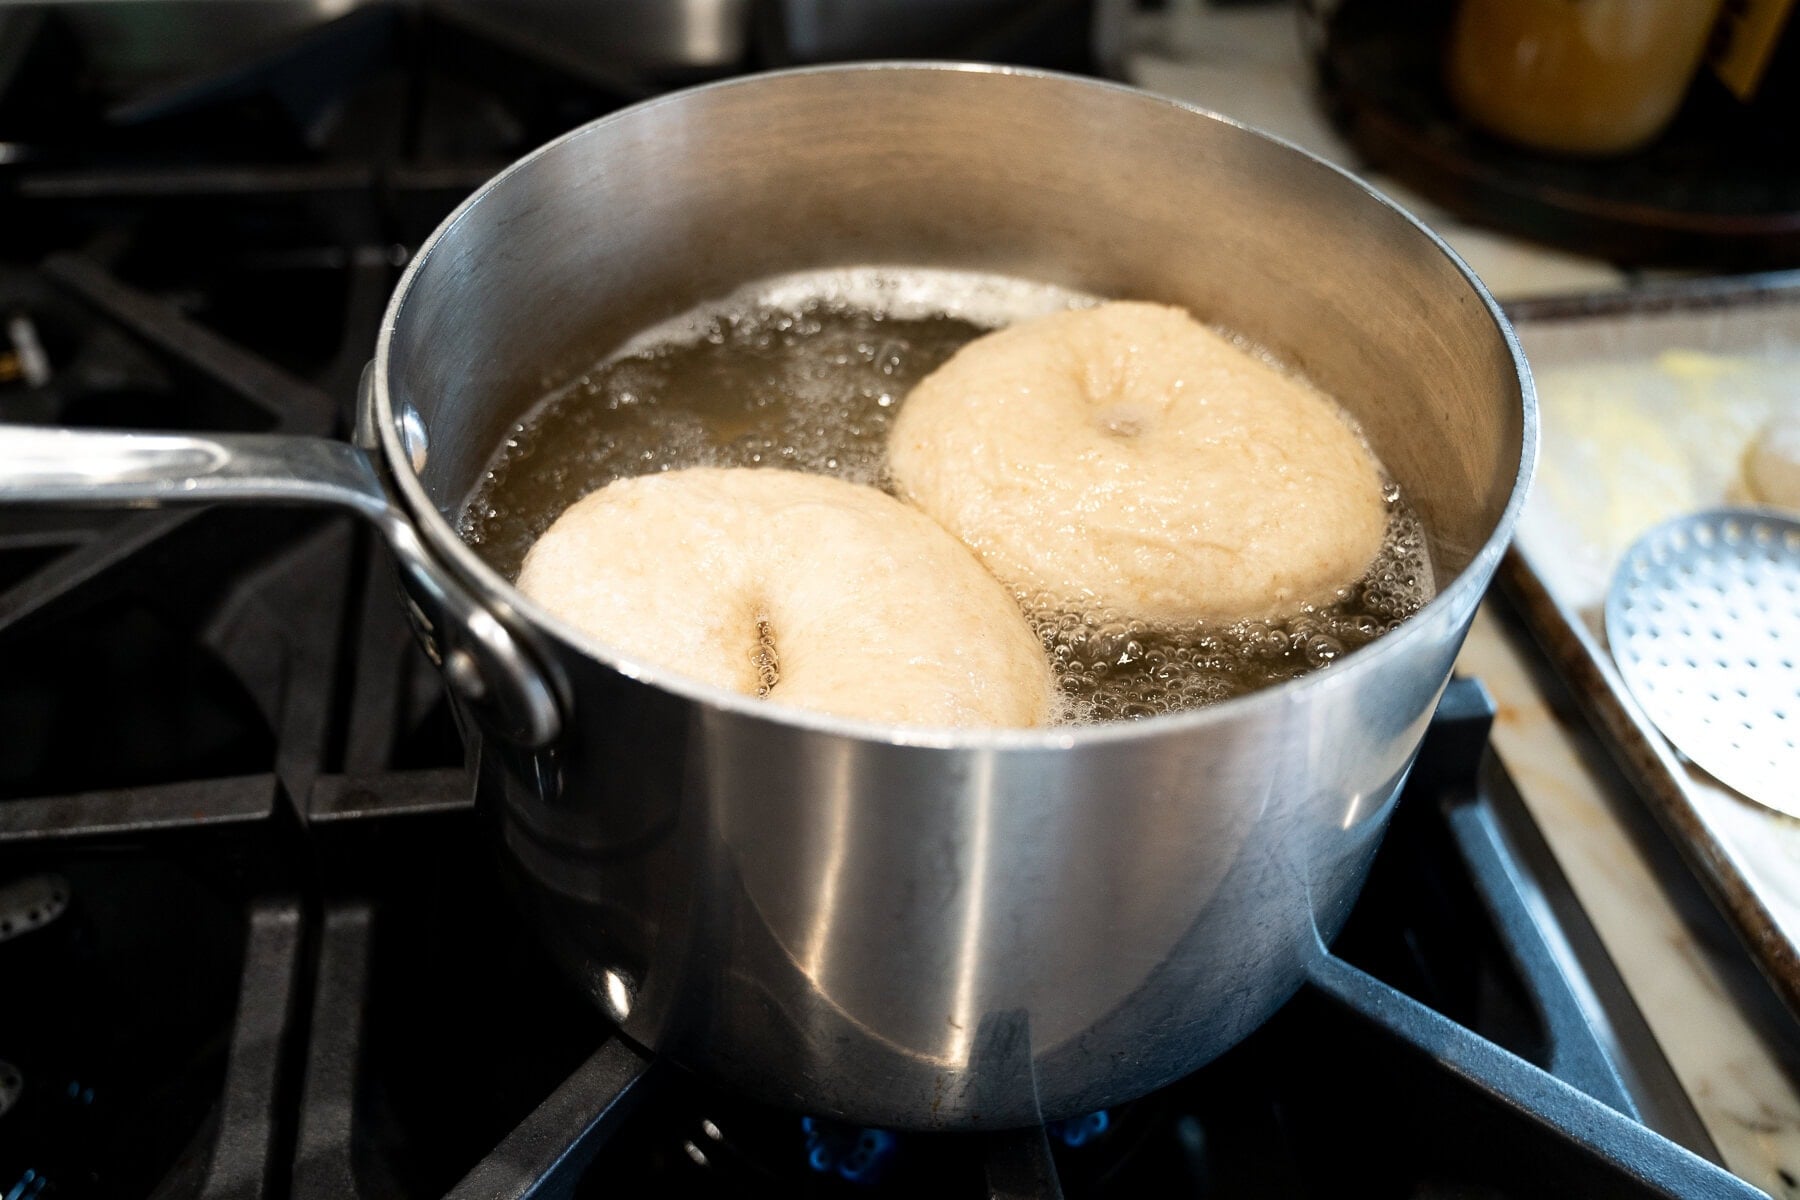
Step 5: Boil the Bagels
Preheat your oven to 450 °F (230 °C). Meanwhile, bring about 3 quarts (or enough to let bagels float) of water to a boil in a deep pot. Stir in honey, barley malt syrup or brown rice syrup.
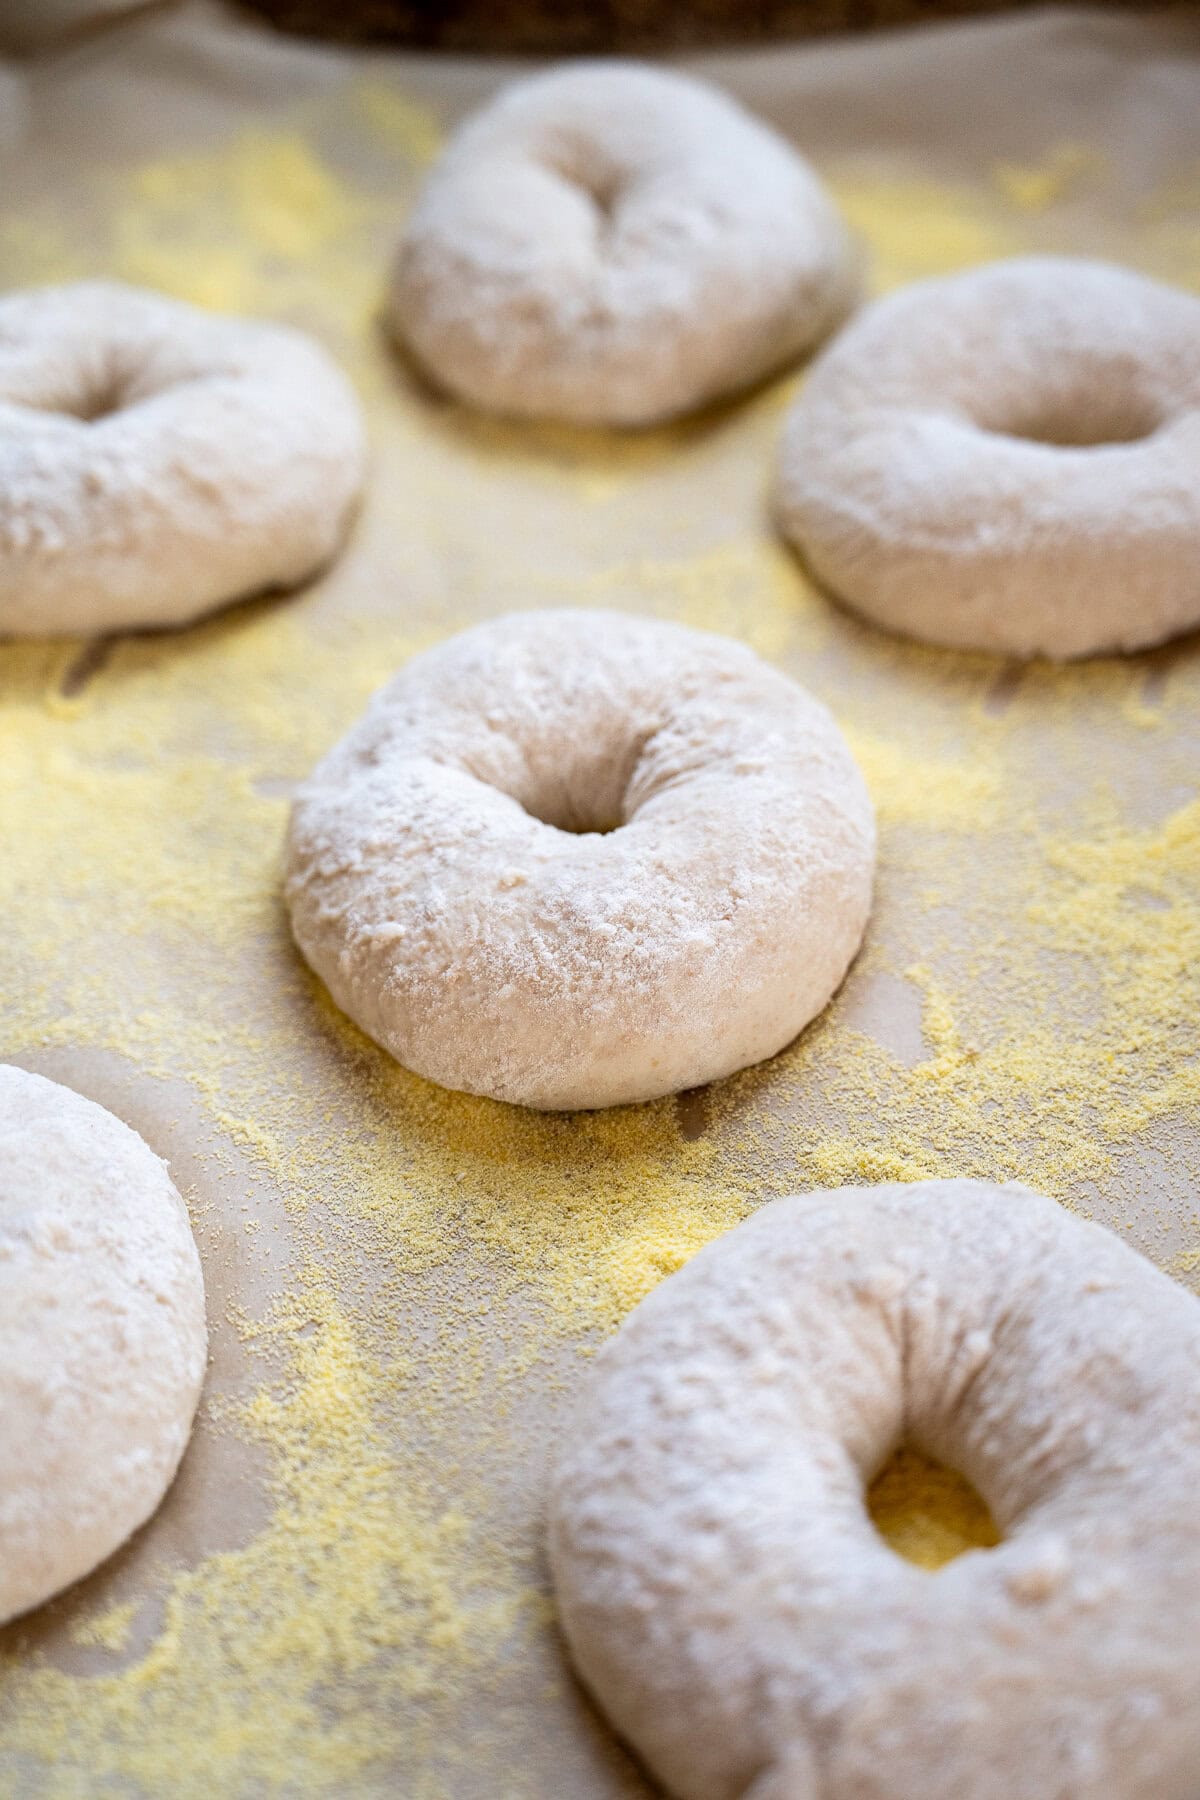
Using a slotted spoon, drop 2 bagels at a time top‑side down into the water. They should float immediately—if not, they may need a little more proofing. Boil for 30–45 seconds on one side, flip, and boil another 30–45 seconds on the other side. Remove and briefly drip‑dry on a plate with folded paper towel, then transfer back to the baking sheet and immediately sprinkle your toppings (poppy seeds, sesame seeds, onion flakes, everything mix, etc.).
Pro Tip: Don’t overcrowd the pot — bagels must float freely for best crust development.
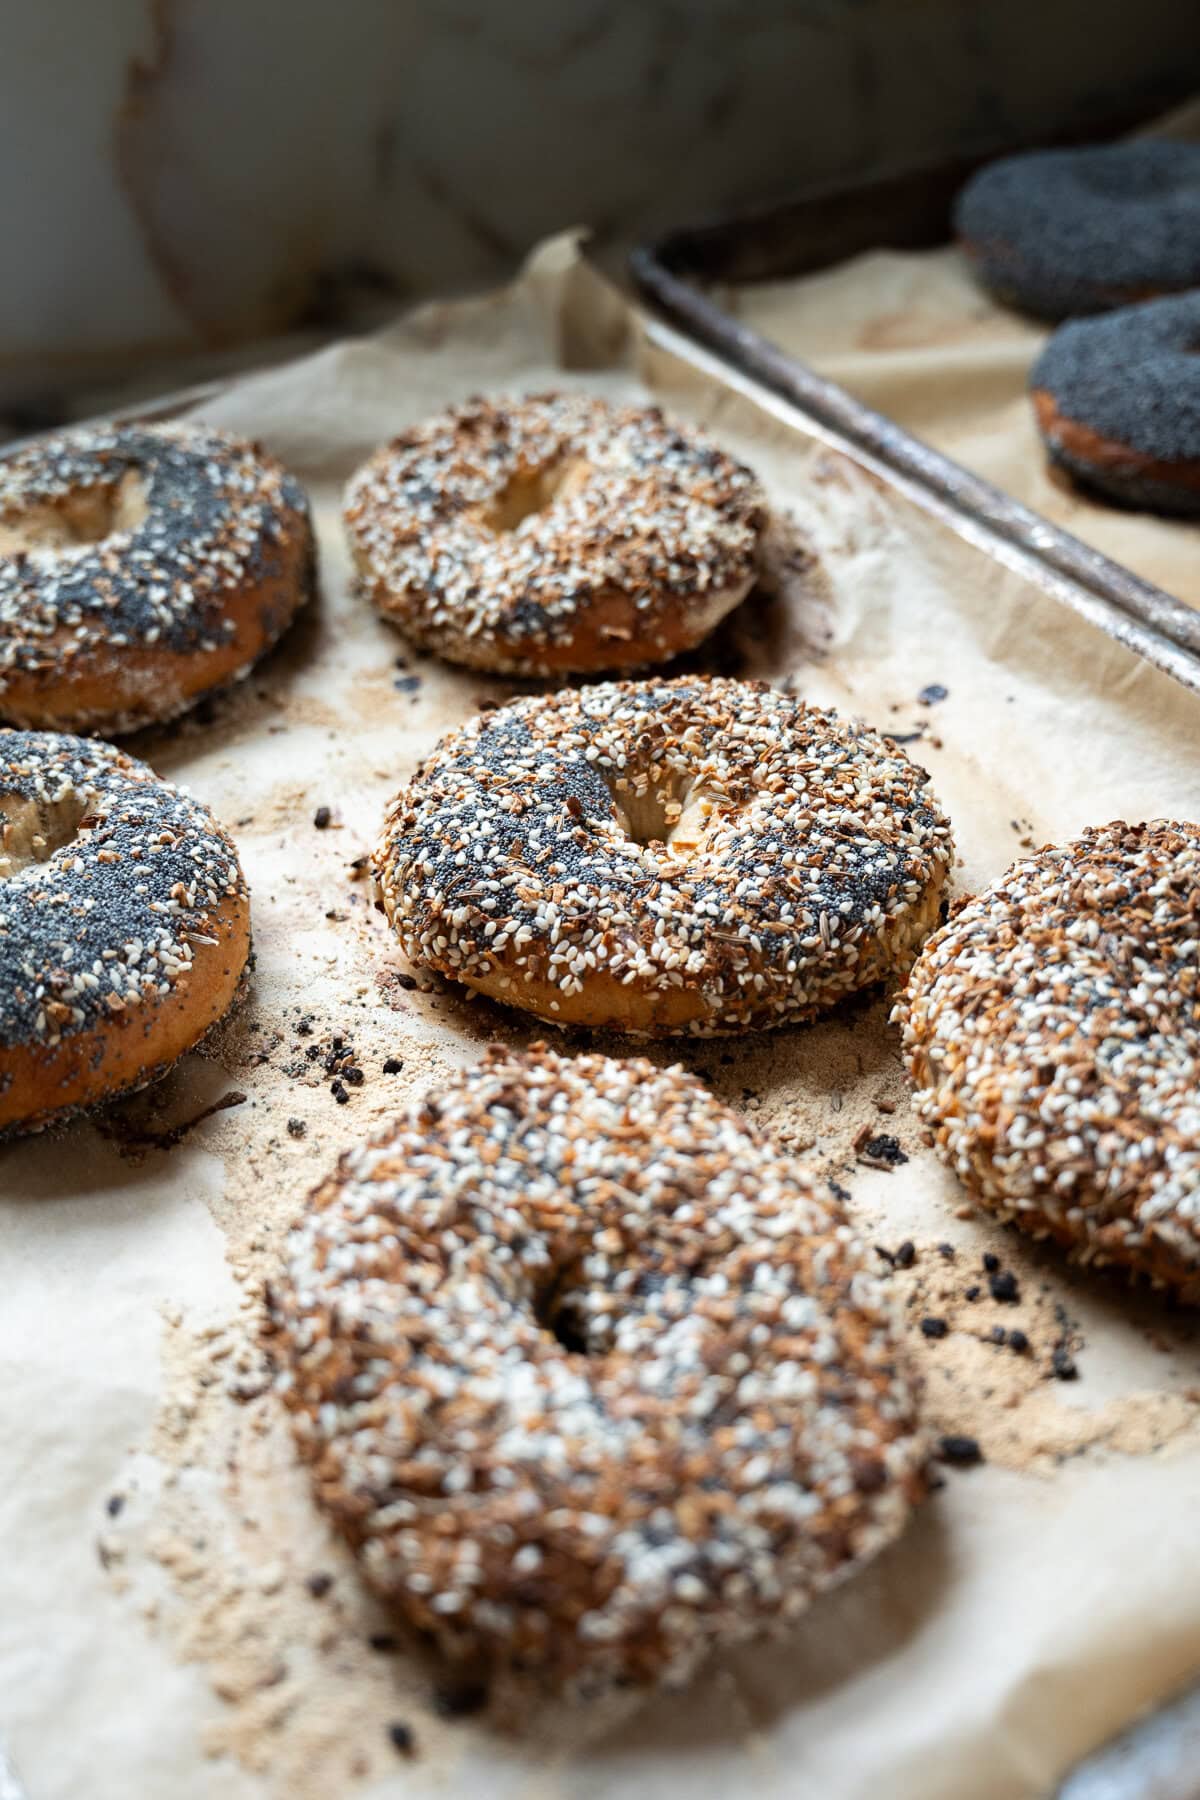
Step 6: Bake the Bagels
With oven pre‑heated to 450 °F (230 °C), place your sheet pan on the middle rack. If using a disposable foil roasting pan upside down over the tray, that creates a mini‑steam chamber to enhance crust.
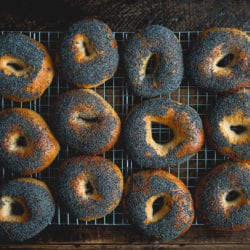
Bake 5 minutes at 450°F, then reduce to 425°F (220 °C) and bake an additional ~20 minutes, or until bagels are deep golden brown and sound hollow when tapped. Halfway through bake, rotate trays or switch positions for even browning. Transfer baked bagels to a wire rack for cooling (~15 minutes) before slicing.
Example: A classic sesame bagel comes out with a glossy golden crust, crisp seeds, and chewy bite—just like your favorite morning bagel.
Step 7: Serve or Store
Enjoy your bagels warm—split and spread with cream cheese, add avocado, smoked salmon, or your favorite toppings. To freeze: allow to cool completely, then place in a plastic bag, squeeze out excess air, and freeze. When ready to enjoy, slice and toast from frozen for excellent texture.

Scheduling & Planning
If you already bake with your starter for focaccia, you’ll find this schedule familiar.
- Day 1 (evening): Mix the dough and begin bulk ferment.
- Day 2 (morning): Shape, proof, boil and bake.
If your kitchen is warm and risk of over‑fermenting exists, place dough in the fridge overnight after bulk ferment and finish next morning for the best control.
Flour, Sweeteners & Variation Notes
- Flours: Use bread flour for optimum chew. Adding 75 g rye or whole wheat adds extra flavor and texture—but you can stick with straight bread flour if you prefer.
- Sweeteners: Honey is my go‑to; barley malt syrup is traditional in bagel making; brown rice syrup is a fine substitute if others aren’t available.
- Toppings & flavors: Sesame seeds, poppy seeds, everything bagel mix, onion flakes are classic.
- Want to try something different? Add caraway seeds, cheddar cheese topping, or cinnamon‑raisin mix for a sweeter variation.
- Hydration Adjustment: Because bagel dough is firm by design, if your ambient climate is humid you may reduce water slightly (~10–15 g) and bake a few minutes longer.
Troubleshooting: What Can Go Wrong & How to Fix It
- Bagels sink when boiled: They likely were under‑proofed. Let the shaped bagels proof longer until they’re visibly puffy and pass the float test.
- Holes disappear in baking: Either the ring was too small (make ~2″ hole) or proofing was too aggressive so the dough spread. Keep shaping hole generous and proof until just springy.
- Bagel has soft crust, not chewy: You may have skipped the sweetened water bath or baked at too low temperature. The short boil + high‑heat bake gives that signature chew.
- Bagel crumb too dense/gummy: Possibly over‑proofed or dough too slack. Ensure firm dough (bagel dough is stiffer than bread dough), and proof until springy not collapsing.
- Toppings falling off: Ensure you sprinkle toppings right after bagels come out of the water bath while surface is still slightly moist.
Pro Tip: Bagel making is more about cues (rise, float test, dough feel) than exact minutes.

Variations & Serving Ideas
- Everything Bagel: After boiling, sprinkle a mix of sesame seeds, poppy seeds, dried onion flakes, garlic flakes, and coarse sea salt.
- Cheddar or Asiago Bagel: After boiling, top with shredded cheese then bake normally.
- Whole Wheat / Rye Bagel: Replace part of the bread flour with whole wheat or rye for a heartier flavor and texture, much like the whole wheat cookies recipe.
- Freezer Batch: Make full recipe, bake, slice and freeze the baked bagels in a plastic bag. Toast straight from frozen for convenience.
Which Flour Should You Use?
Here’s a quick comparison:
| Flour Type | Texture Impact | Flavor Impact |
|---|---|---|
| Bread flour (100%) | Maximum chew, strong ring | Neutral, classic bagel taste |
| Bread + Rye/Wheat | Slightly denser, more flavor | Earthy, nutty undertone |
| All‑purpose only | Softer bite | Lighter flavor |
If you’re going for the best bagels, bread flour or combination is ideal. Replacing part of the bread flour with whole wheat or rye adds a depth of flavor and heartiness as we discussed in our sourdough bread guide.
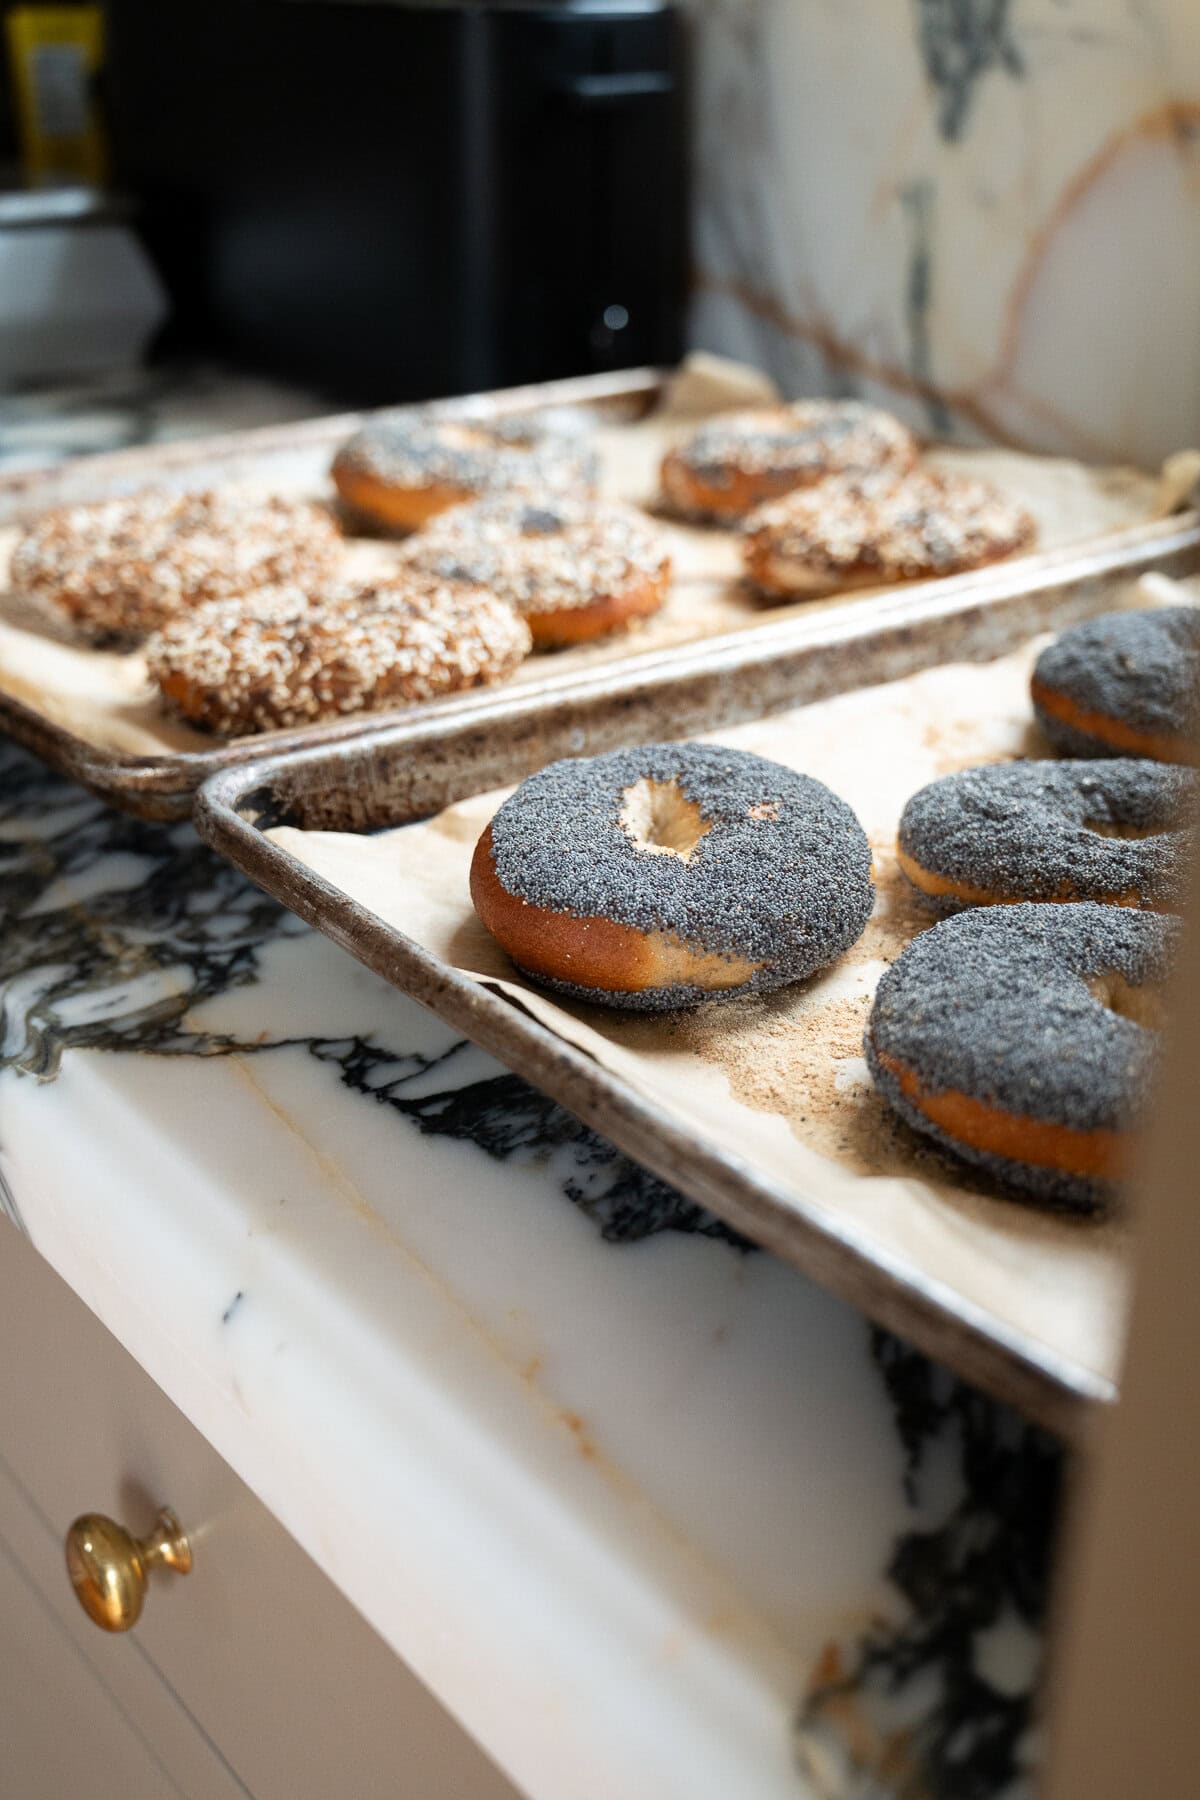
Cooling, Storage & Freezing
Best practice: place baked bagels on a wire rack to cool completely. This lets steam escape and the crust sets properly.
At room temperature, store in a plastic bag openly for 1–2 days.
For longer storage: individually wrap or place in freezer‑safe bag and freeze. To serve, slice and toast from frozen for that fresh‑baked feel.
FAQs
Yes—if your starter is less active or you use discard, allow the dough a little extra time to bulk ferment and proof. You’ll still get tasty bagels, just keep a close eye on rise cues.
Because bagels need to hold shape (especially during the boil) and deliver chew rather than soft airiness. A firm dough helps give that classic dense crumb and helps retain shape during boiling.
Warmer kitchens speed things up; cooler ones slow them down. Your goal is puffy, springy dough—not strictly X hours. Monitor dough, cover with a damp towel or plastic wrap to avoid crust on top, and adjust timing accordingly.
The water bath sets the crust and allows the dough to gelatinize the surface, giving that chewy “bagel crust” and shine. It’s what differentiates a plain roll from a true bagel.
Bulk: until doubled (guideline ~8 hours at room temp). Final proof: about 1 hour after shaping until puffy and just springy. Perform a float test: if the shaped bagel floats in hot water, it’s ready.
Absolutely! Once fully cooled, slice then freeze bagels in a plastic bag. When ready to eat, toast from frozen for near‑fresh texture.
Final Thoughts & Your Next Batch
Making your own homemade bagels using sourdough is incredibly rewarding. With this workflow—from mixing to shaping, boiling to baking—you’ve got the tools to make the best bagels. As you bake again, you’ll start to hone your feel for dough, proofing time, and flavor tweaks.
Example: Next time you might try a cheddar‑popcorn topping, or swap some of the bread flour for whole wheat for a nutty twist. The framework is solid and flexible.
And remember: if you already bake sourdough bread or focaccia (like we covered on Fare Isle), you’re already halfway there. Use your sourdough starter confidently, measure by feel, and enjoy every bite.
Happy baking—and may your next batch of bagels be the one all your friends ask you to make again.
More Delicious Sourdough Recipes
- How to Make Sourdough Starter from Scratch
- Homemade Artisan Sourdough Bread Recipe
- Sourdough Focaccia Bread Recipe (Easy – No-Knead)
- Sourdough Discard Crackers
- Easy Sourdough Scones Recipe – Buttery, Flaky & Delicious
- Vegan Sourdough Donuts
- Sourdough Jam Sandwich Cookies
- Vegan Sourdough Danish
- Sourdough Chai Spice Star bread recipe
- Artichoke Olive and Spinach Stuffed Sourdough Star Bread
Love This Recipe?
Please leave a star rating of the recipe and let me know what you think in a comment below. This small act is a great way to show your support for the food blogs you read and love.
Tag @fareisle in your photos on Instagram with #fareisle so I can see your creations!
Homemade Sourdough Bagels Recipe
Ingredients
- 200 g active sourdough starter (100% hydration)
- 420 g water
- 40 g honey (or barley malt syrup or brown rice syrup)
- 675 g bread flour
- 75 g rye flour (or whole wheat flour)
- 16 g kosher salt
- 3 tablespoons honey (or barley malt syrup or brown rice syrup for boiling)
- 1/4 cup poppy seeds (or sesame seeds, onion flakes, caraway seeds, everything bagel mix, etc.)
- 1/4 cup cornmeal (for parchment paper)
Instructions
Mix the dough
- In a large bowl or stand mixer, combine water and active sourdough starter. Stir to break up the starter. Add bread flour, rye/whole wheat flour, salt, and honey/barley malt syrup.
- Mix with a dough hook on low speed for 5–8 minutes, or knead by hand until a smooth, tacky ball forms.
Bulk ferment
- Shape the dough into a ball and place in a lightly oiled bowl. Cover with plastic wrap or a damp towel.
- Bulk ferment the dough at room temperature until it doubles in volume (about 8 hours) and is soft and puffy. You may see 1 or 2 large bubbles form.
Portion the dough
- Turn dough onto a lightly floured surface. Divide into 12 equal pieces and shape each into a smooth ball. Let rest 10 minutes before shaping.
Shape the bagels
- Transfer the balls to two parchment paper lined baking sheets and cover one sheet with a kitchen towel, while you work on shaping the other sheet into bagels. Lightly dust the dough and your hands with flour if the dough feels tacky.
- Press your thumb through the center of each dough ball to form a 2″ hole. Stretch gently into a ring.
- Place on parchment-lined baking sheets dusted with cornmeal and cover with a towel. Proof at room temperature until puffy and slightly springy (~1 hour).
Boil the bagels
- Bring a large pot of water to a boil and add honey, barley malt syrup, or brown rice syrup.
- Boil 2 bagels at a time for 30–45 seconds per side. Remove with a slotted spoon, briefly drain, and return to the baking sheet. Sprinkle with or dip into toppings immediately.
Bake the bagels
- Preheat oven to 450°F (230°C).
- Optional: cover sheet pan for the first 5 minutes with an inverted roasting pan for steam.Bake 5 minutes at 450°F, then reduce to 425°F (220°C) and bake 20 minutes more, until golden brown and hollow-sounding when tapped. Rotate trays halfway through for even baking.
Cool and serve
- Transfer bagels to a wire rack and cool 15 minutes. Serve warm with cream cheese or your favorite toppings. Freeze extras in a plastic bag; toast from frozen for best texture.
Video
Notes
- Day 1: Mix dough in the evening and bulk ferment overnight at room temperature. In a warm kitchen, check the dough before bed and refrigerate if it’s rising too fast. Bring to room temperature in the morning to finish bulk fermenting if needed.
- Day 2: Shape, proof, and bake the bagels in the morning.
- A disposable roasting pan helps create a crisp, chewy crust but is optional.
- Bulk fermentation may vary with temperature. Use 8 hours as a guide and watch the dough for puffiness and softness.
Kaity Farrell
Ask me any questions you have!
susan Patrick-Farrell
Success on my first attempt at bagels and your recipe. Nice crust and super airy on the inside just how I like my bagels! Easy to follow
directions too, Thanks Kaity!
Kaity Farrell
They looked so tasty! Thanks for your review!
Adam
Hi, I just found your recipe for bagels and your explanations are great, well produced videos, too. Thanks so much for making this availabl!
It appears your bagels have nice blistering, but it’s a little hard to tell. I like the blistering effect, which I thought was mainly achieved by doing a long retard — which you don’t do. Am I misidentifying the texture on your bagels for microblisters? If not, how do you think you achieve them?
Your bagels are somewhat high hydration as far as bagels go. Other than making the bagels easier to mix, what do you prefer about how this affects the finished product? Thanks!
Kaity Farrell
Thanks for your questions! The longer the bulk ferment the more likely you will have blistering. You’ll have to figure out a schedule that works with your environment. I will often put this bagel dough into the fridge overnight because of timing. I prefer a more airy open crumb in bagels, instead of dense NY style bagels.